> ## Documentation Index
> Fetch the complete documentation index at: https://chatbase.co/docs/llms.txt
> Use this file to discover all available pages before exploring further.
# Build Your First AI Agent
> Create, train, and deploy your first AI Agent in under 5 minutes. Follow this step-by-step guide to get your intelligent assistant live on your website.
In just a few minutes, you'll have a fully functional AI Agent answering questions about your business and engaging with your website visitors. Let's get started!
## Prerequisites
You'll need an active Chatbase account to follow this guide. [Sign up here](https://www.chatbase.co/auth/signup) if you haven't already.
## Overview
Here's what we'll accomplish in this guide:
Set up a new AI Agent and train it using your website or documents
Use the Playground to test responses and fine-tune performance
Add your AI Agent to your website with a simple embed code
**Estimated time:** 5 minutes from start to finish
## Step 1: Create & Train Your AI Agent
### Navigate to Your Dashboard
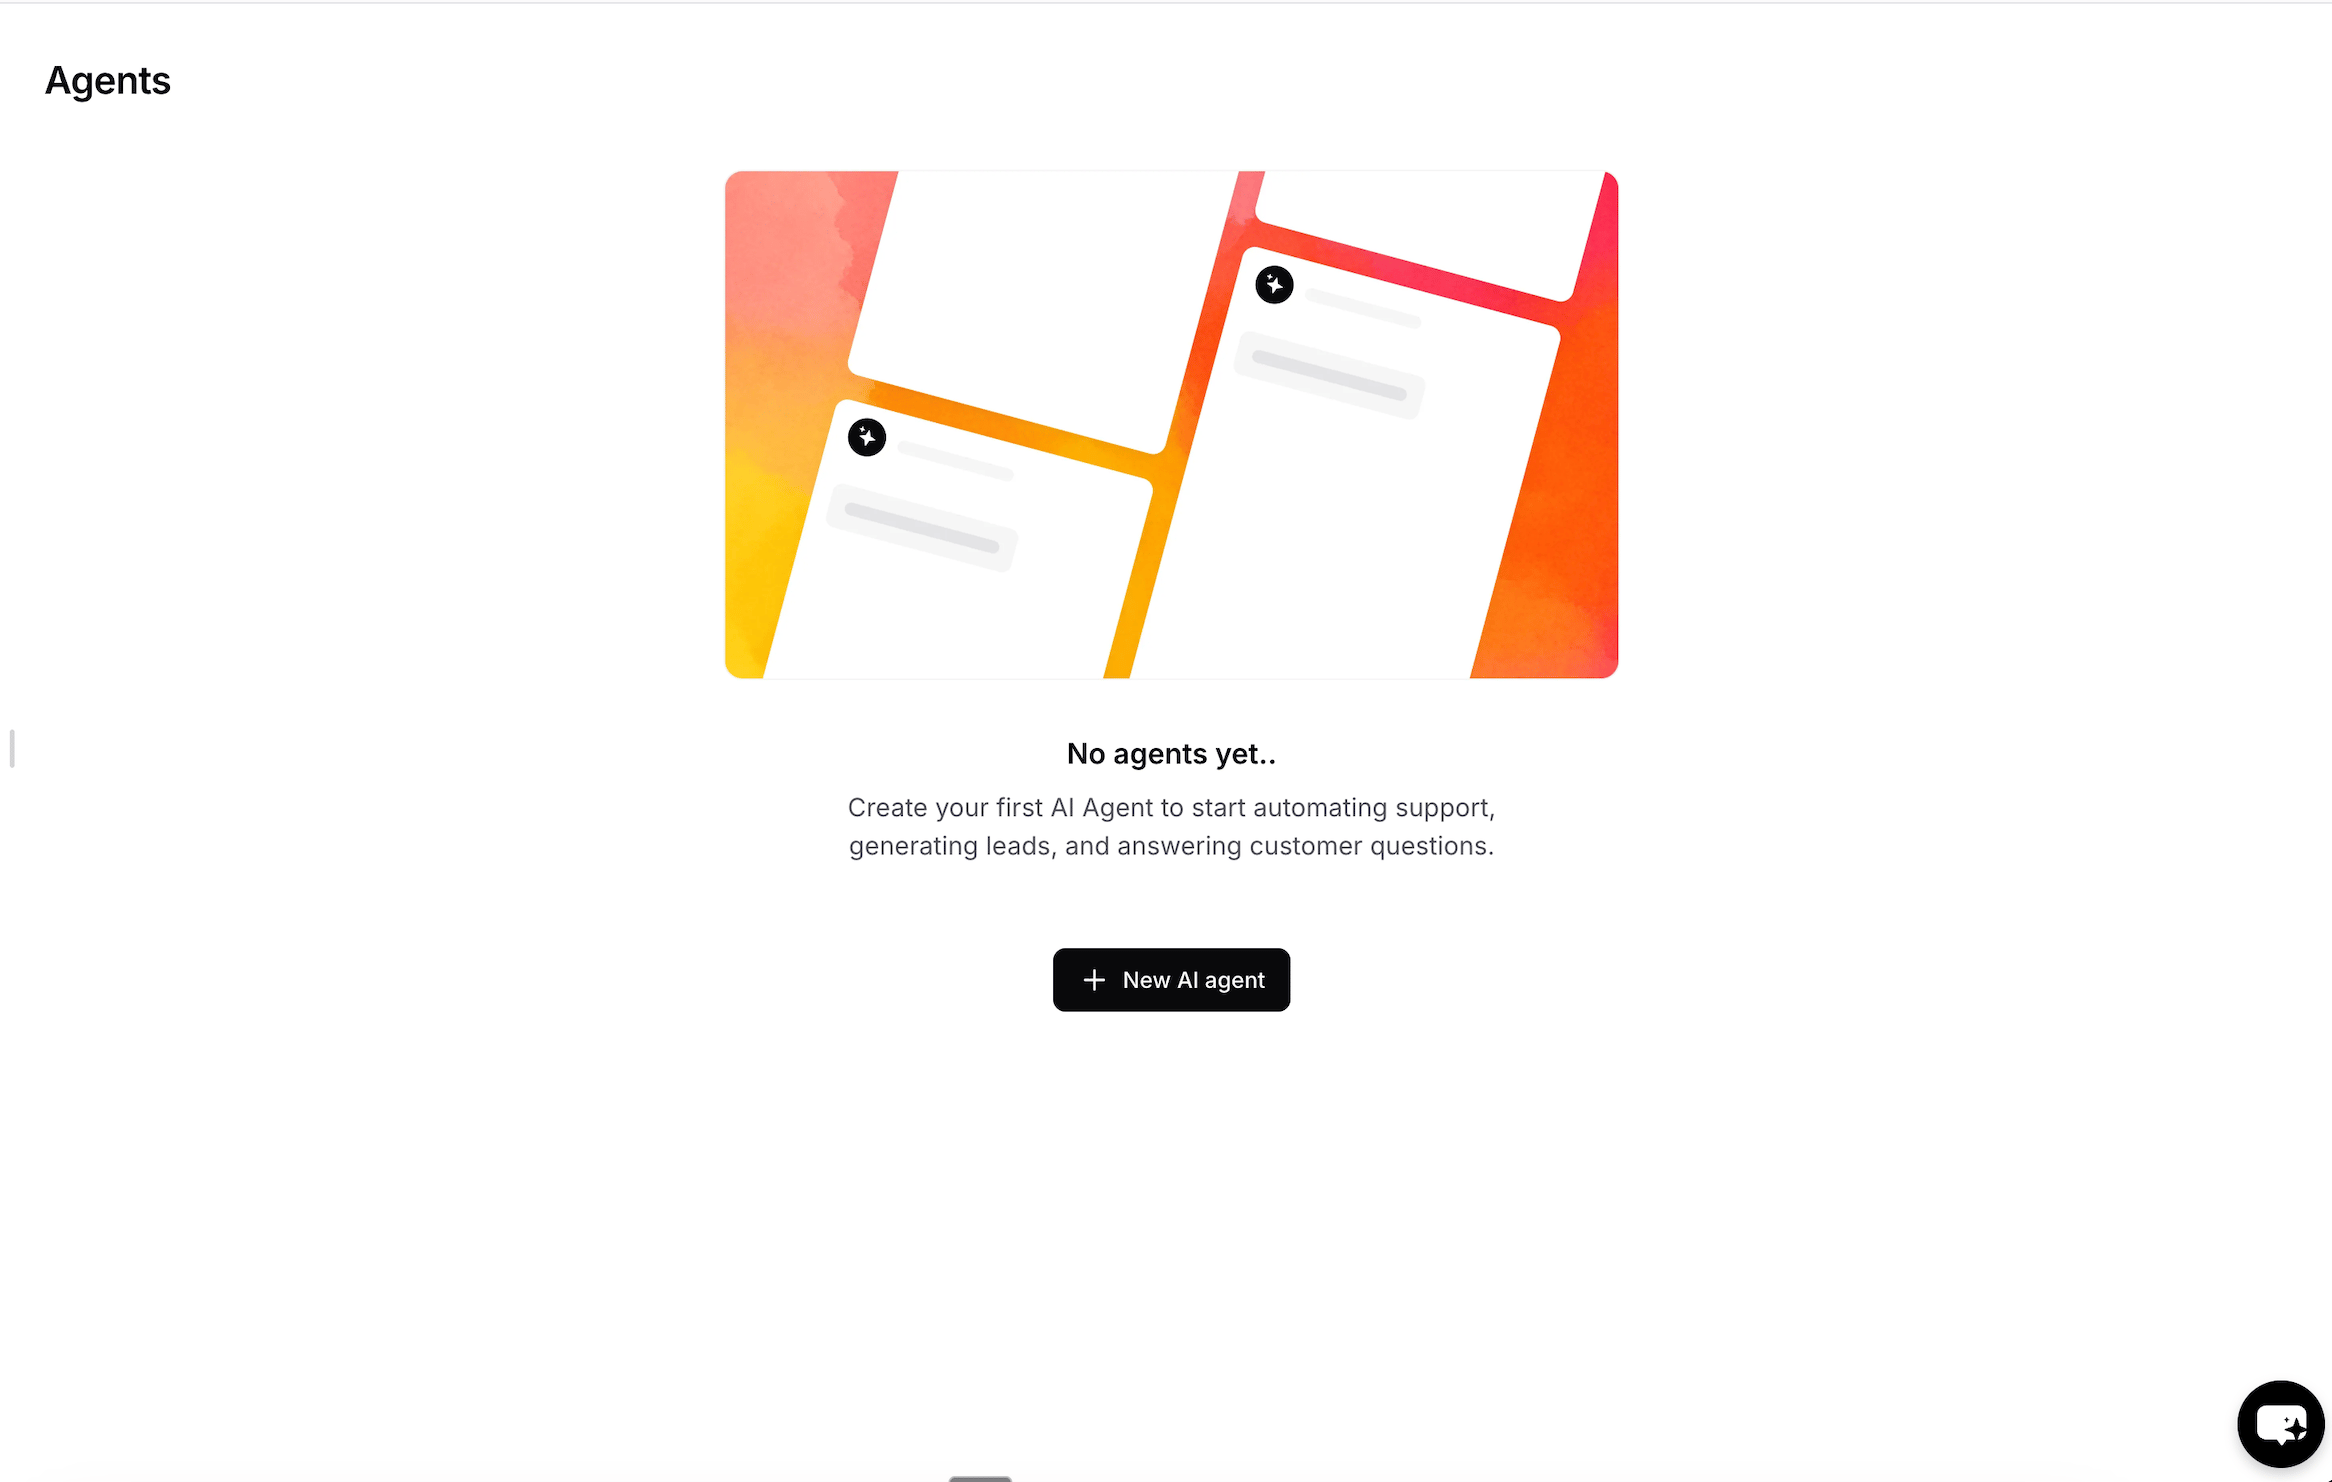
After signing into your Chatbase account, go to your main dashboard.
Click the **"New AI Agent"** button to get started.
 ### Choose Your Training Data
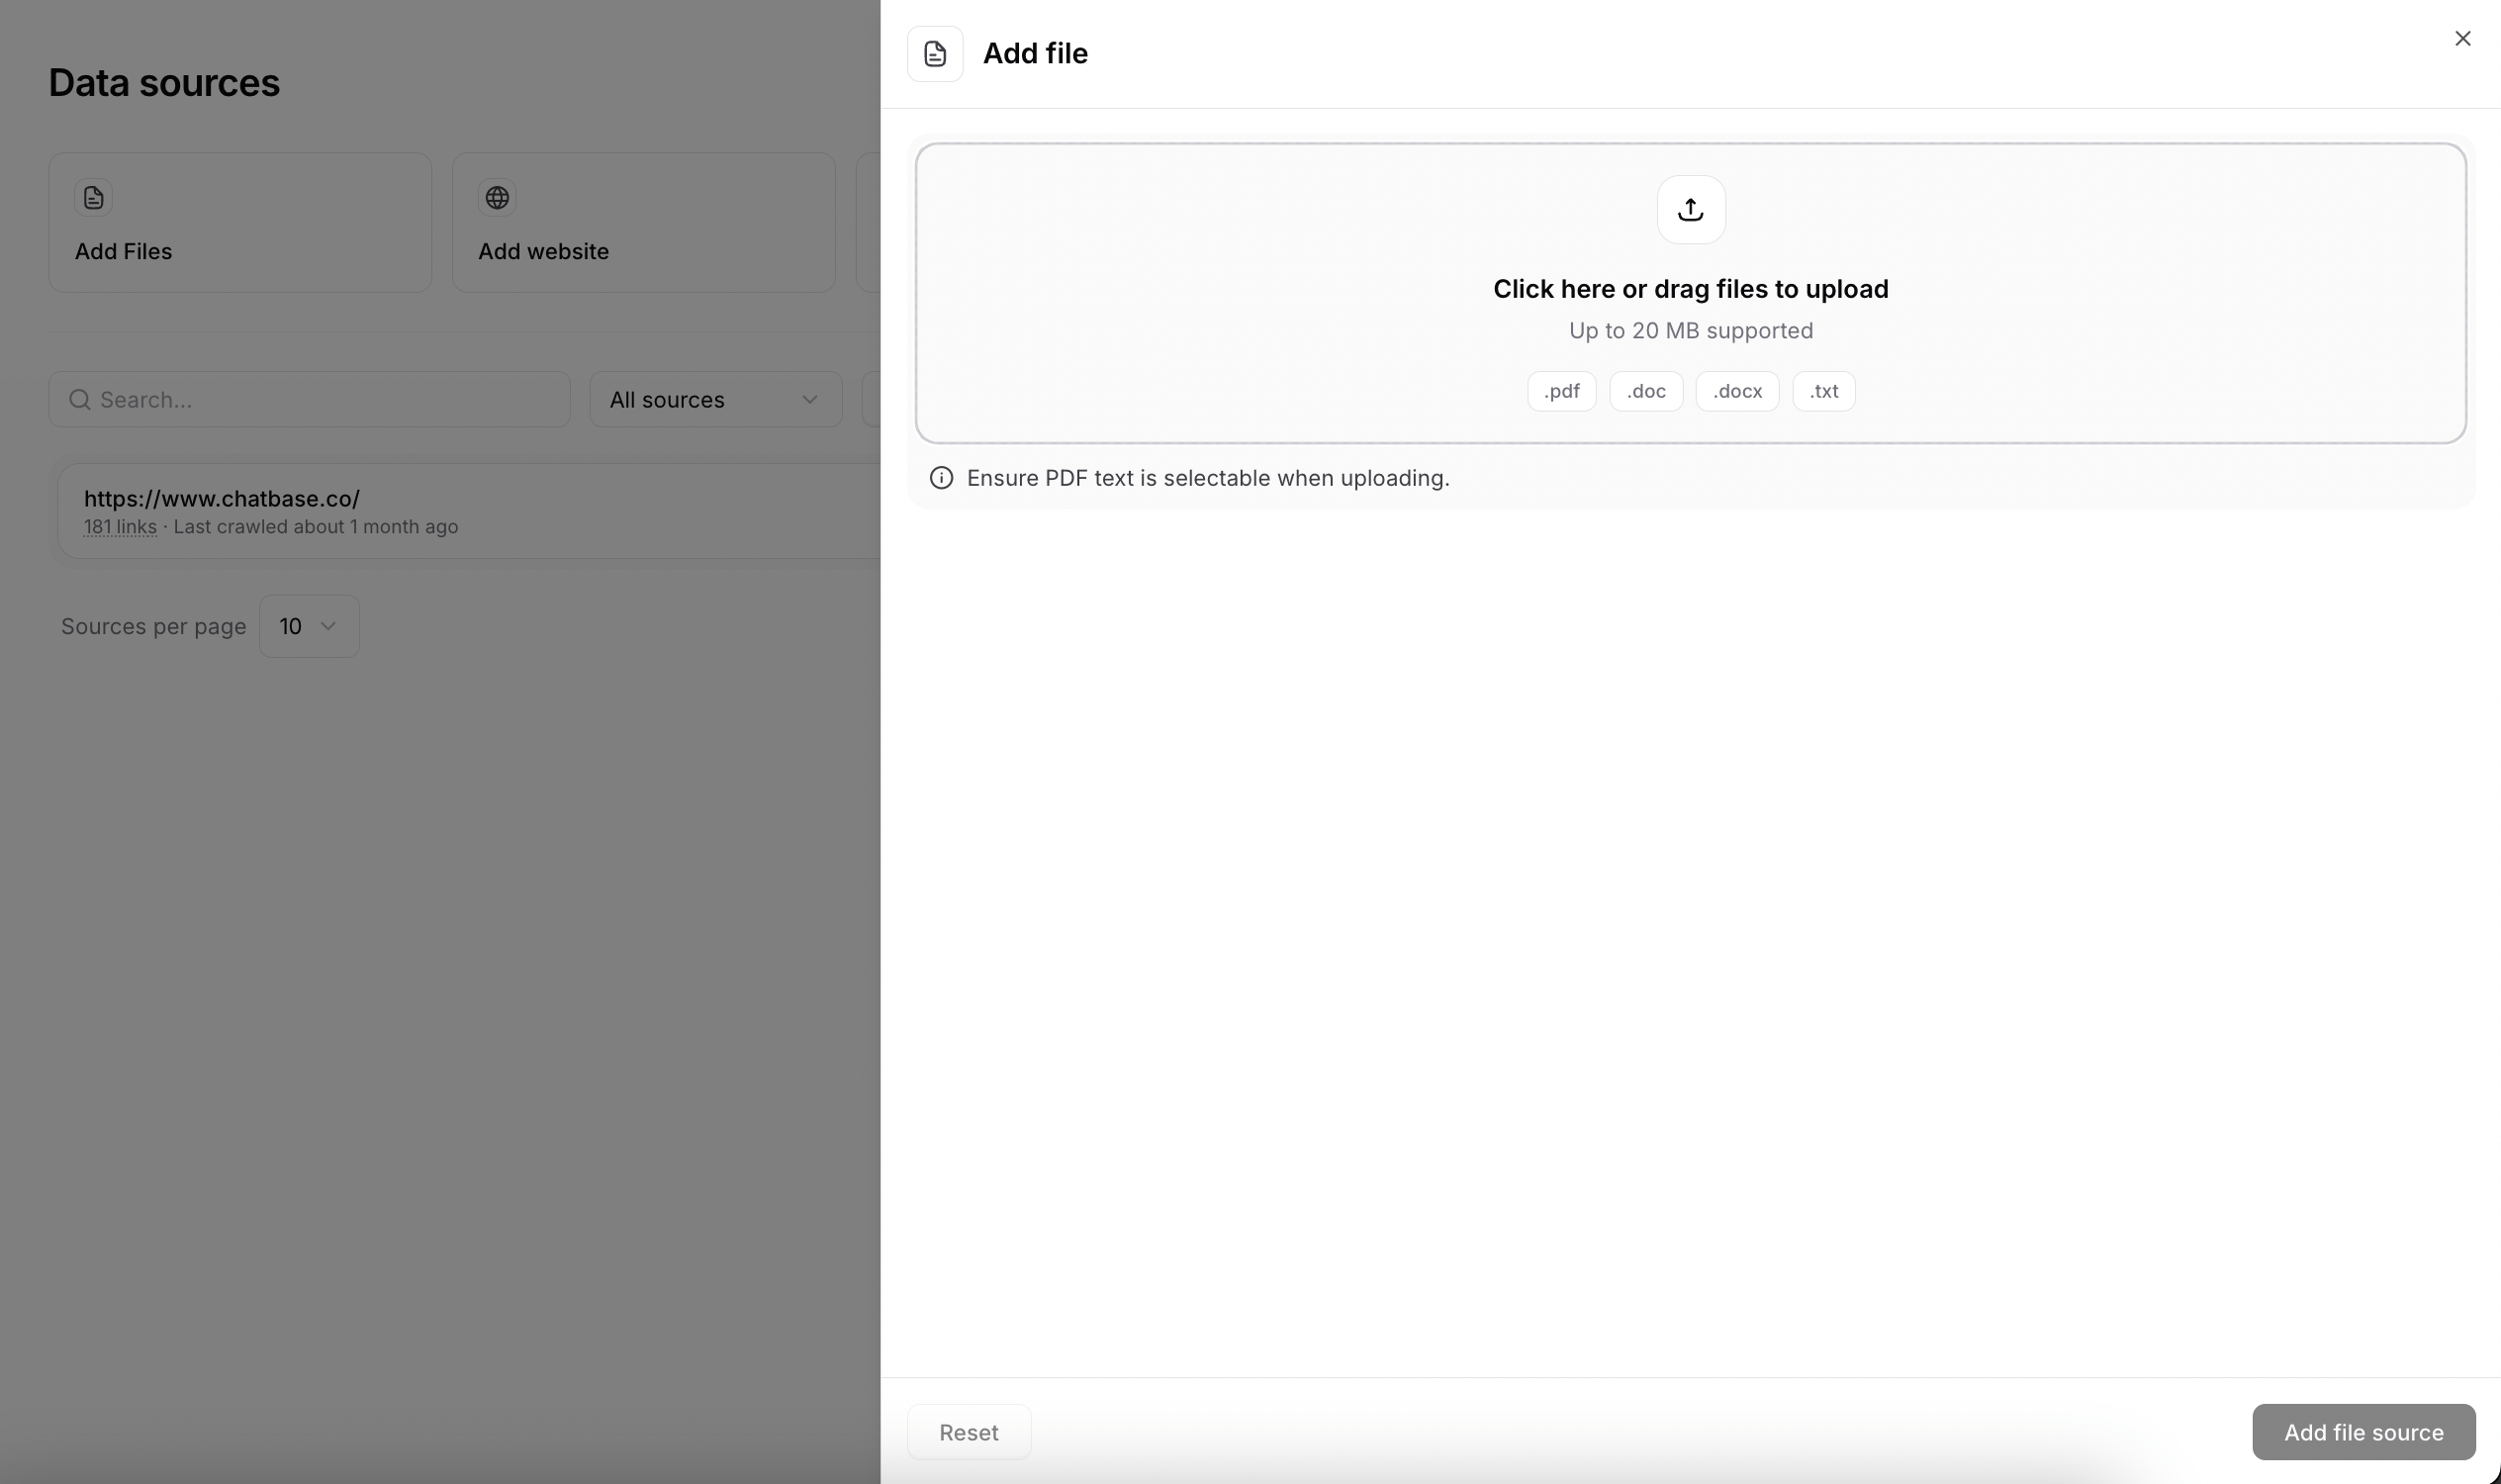
Your AI Agent needs information to learn from. You can train it using various data sources:
**Upload your documents**
Train your agent on your documents.
**Best for:** Business documents, manuals, FAQs, product information, etc.
### Choose Your Training Data
Your AI Agent needs information to learn from. You can train it using various data sources:
**Upload your documents**
Train your agent on your documents.
**Best for:** Business documents, manuals, FAQs, product information, etc.
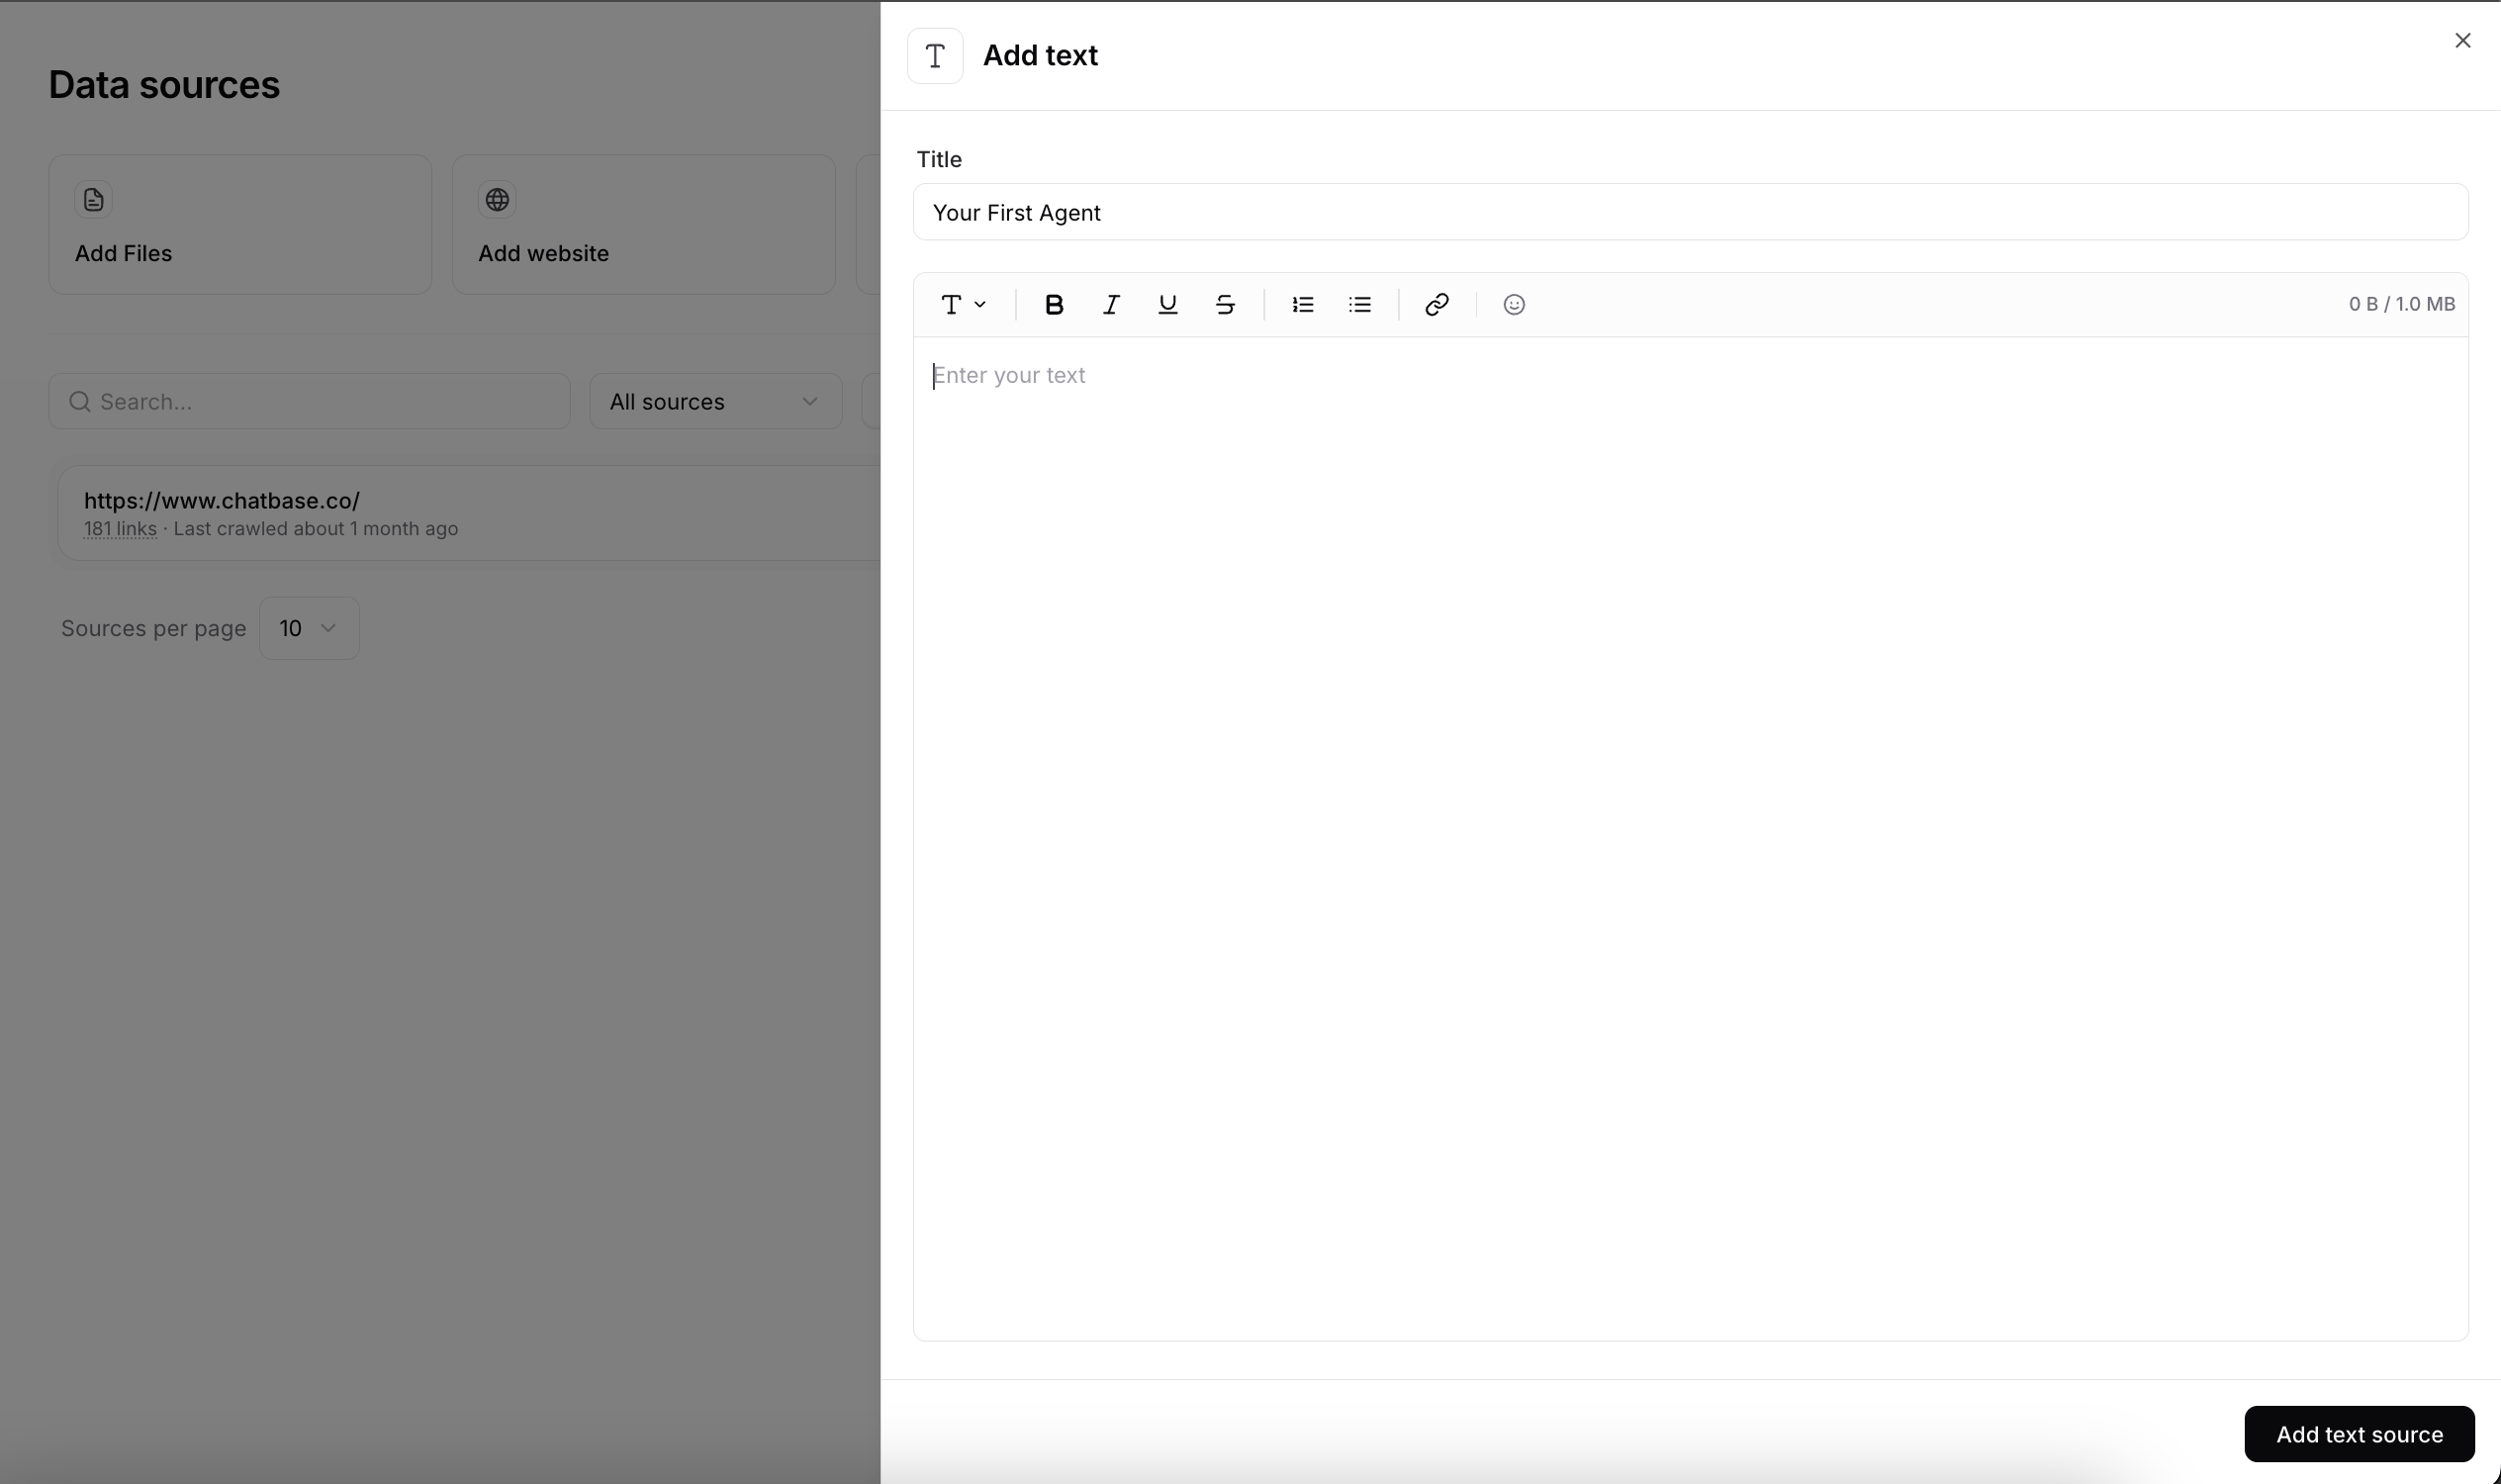
 **Direct text input**
Paste your content directly into the platform. Useful for specific information or custom training content.
**Best for:** Specific information or custom training content
**Direct text input**
Paste your content directly into the platform. Useful for specific information or custom training content.
**Best for:** Specific information or custom training content
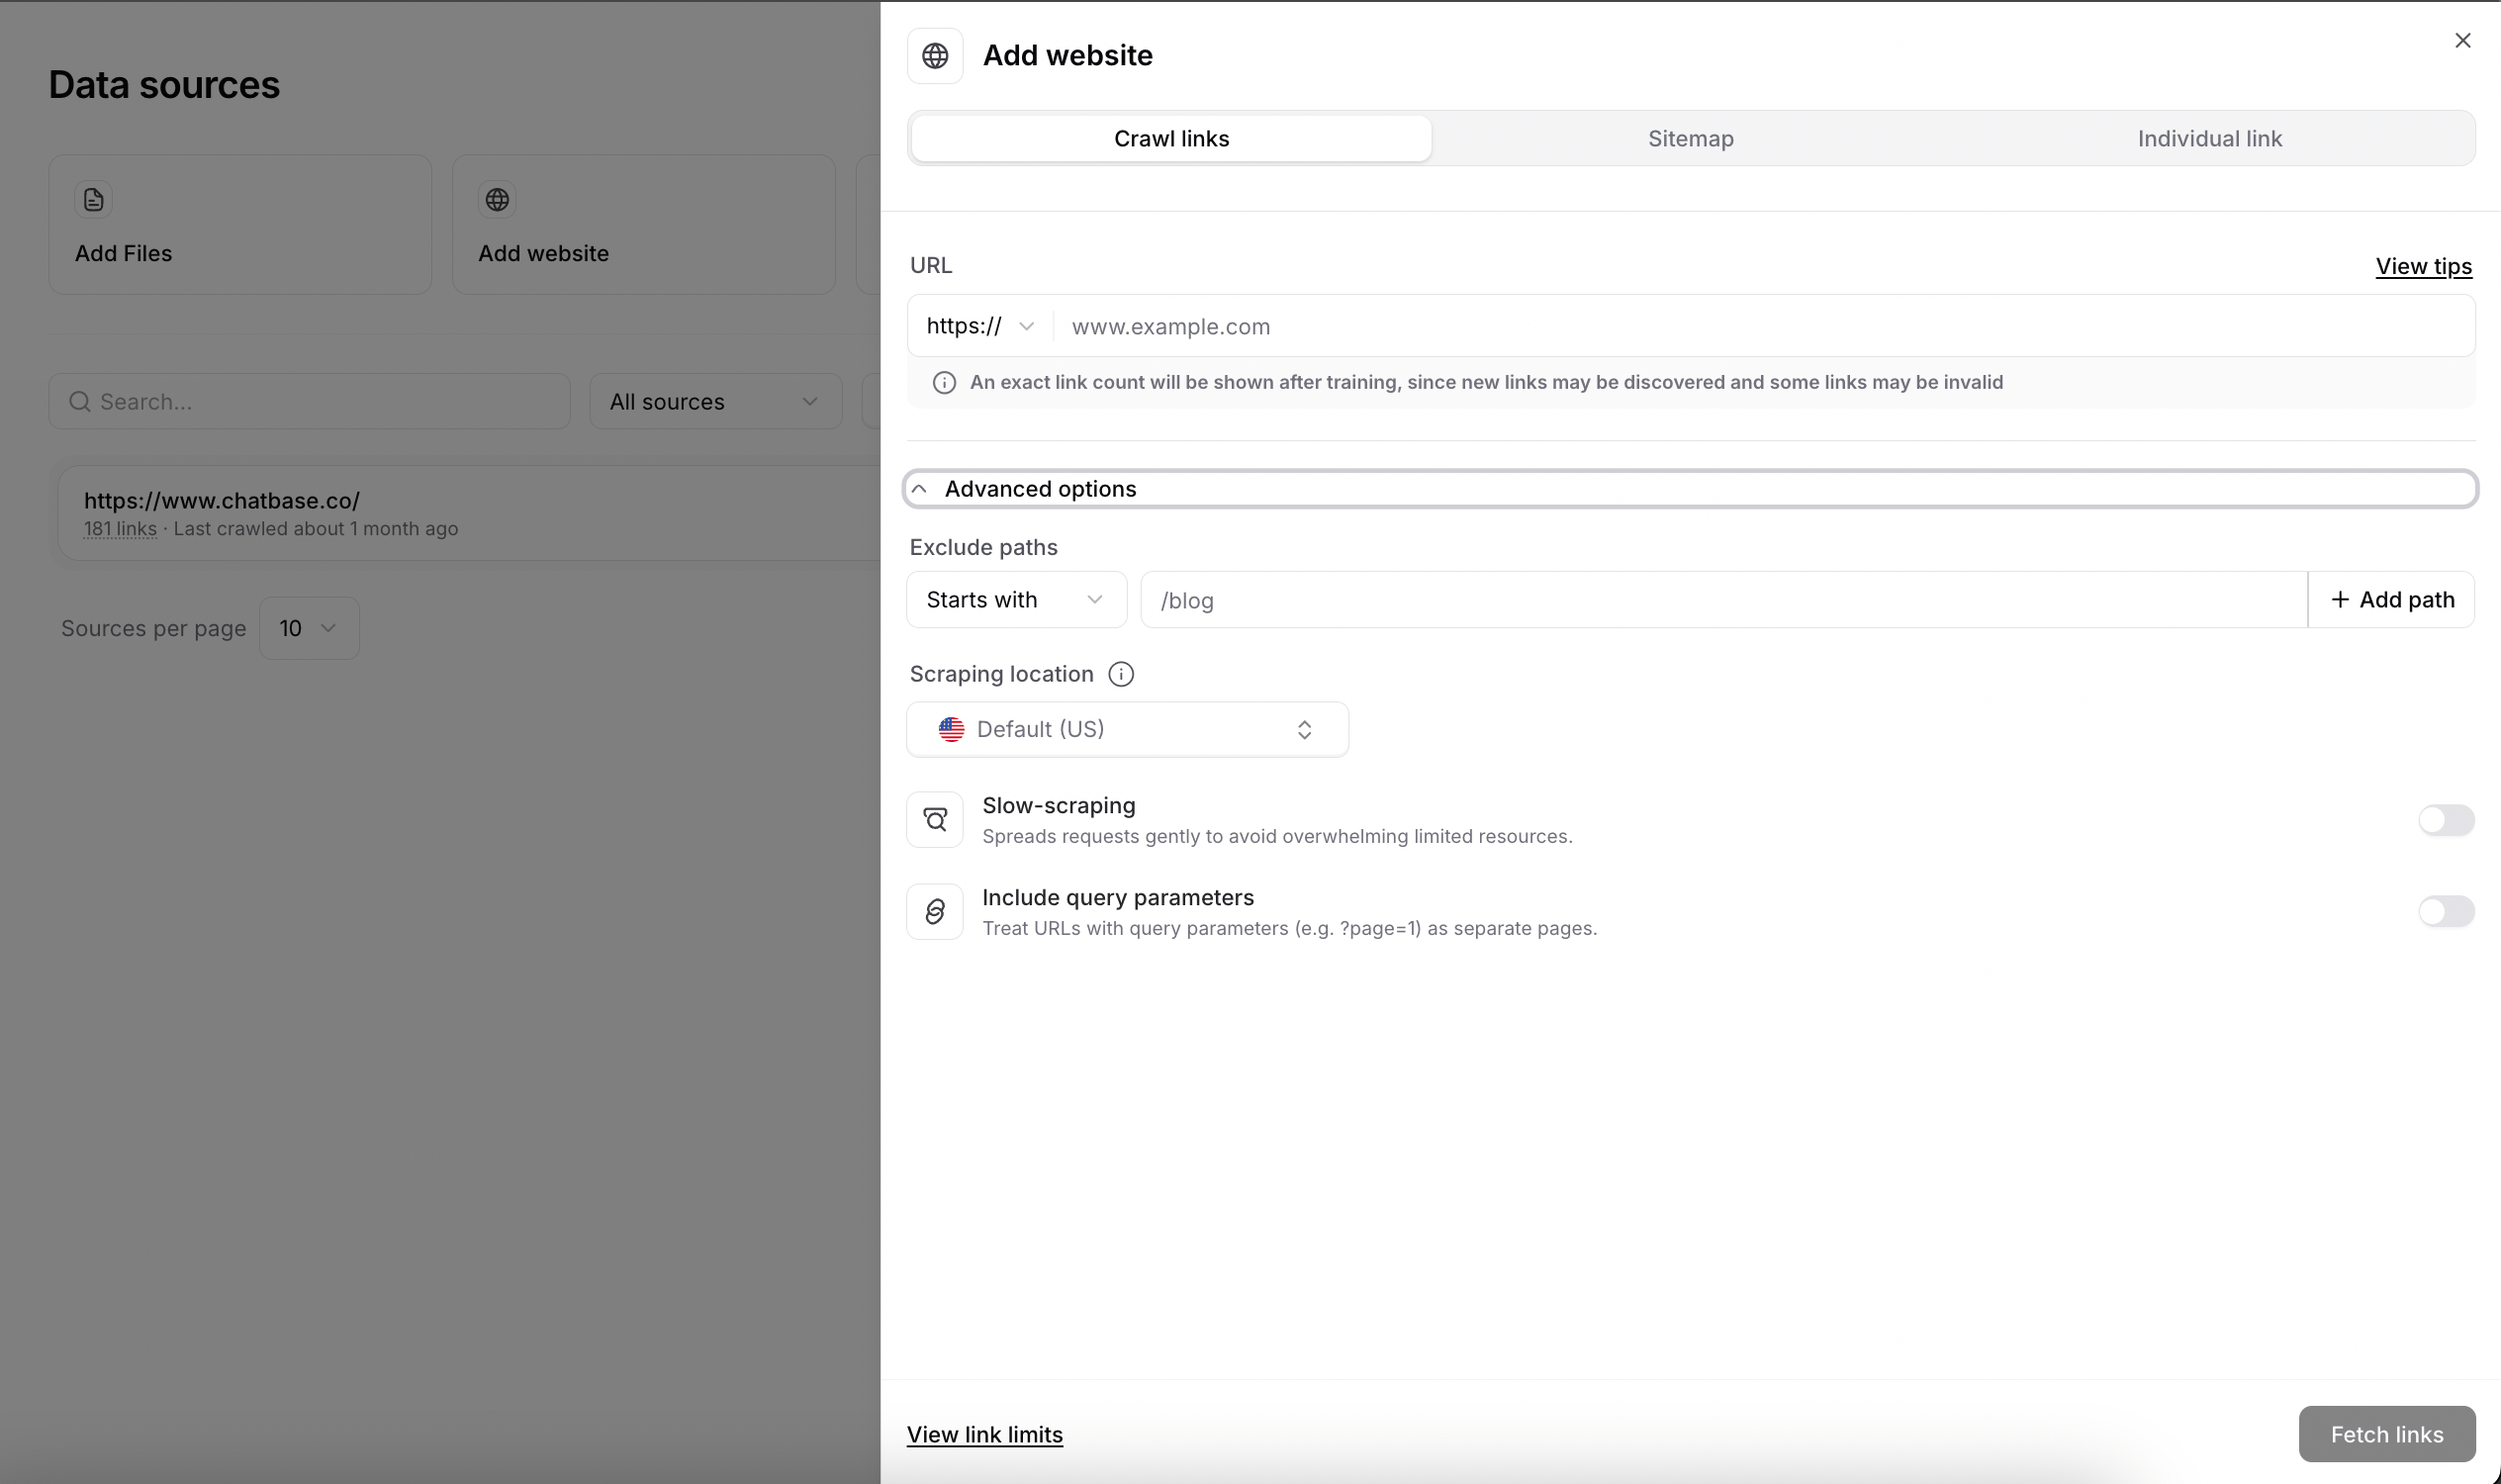
 **Crawl your website**
Our crawlers will discover and learn from all your pages.
**Best for:** Your entire website or sitemap
Our intelligent crawlers will explore your website and all linked pages for training. After crawling completes, you'll see all discovered pages and the total character count available for training.
**Crawl your website**
Our crawlers will discover and learn from all your pages.
**Best for:** Your entire website or sitemap
Our intelligent crawlers will explore your website and all linked pages for training. After crawling completes, you'll see all discovered pages and the total character count available for training.
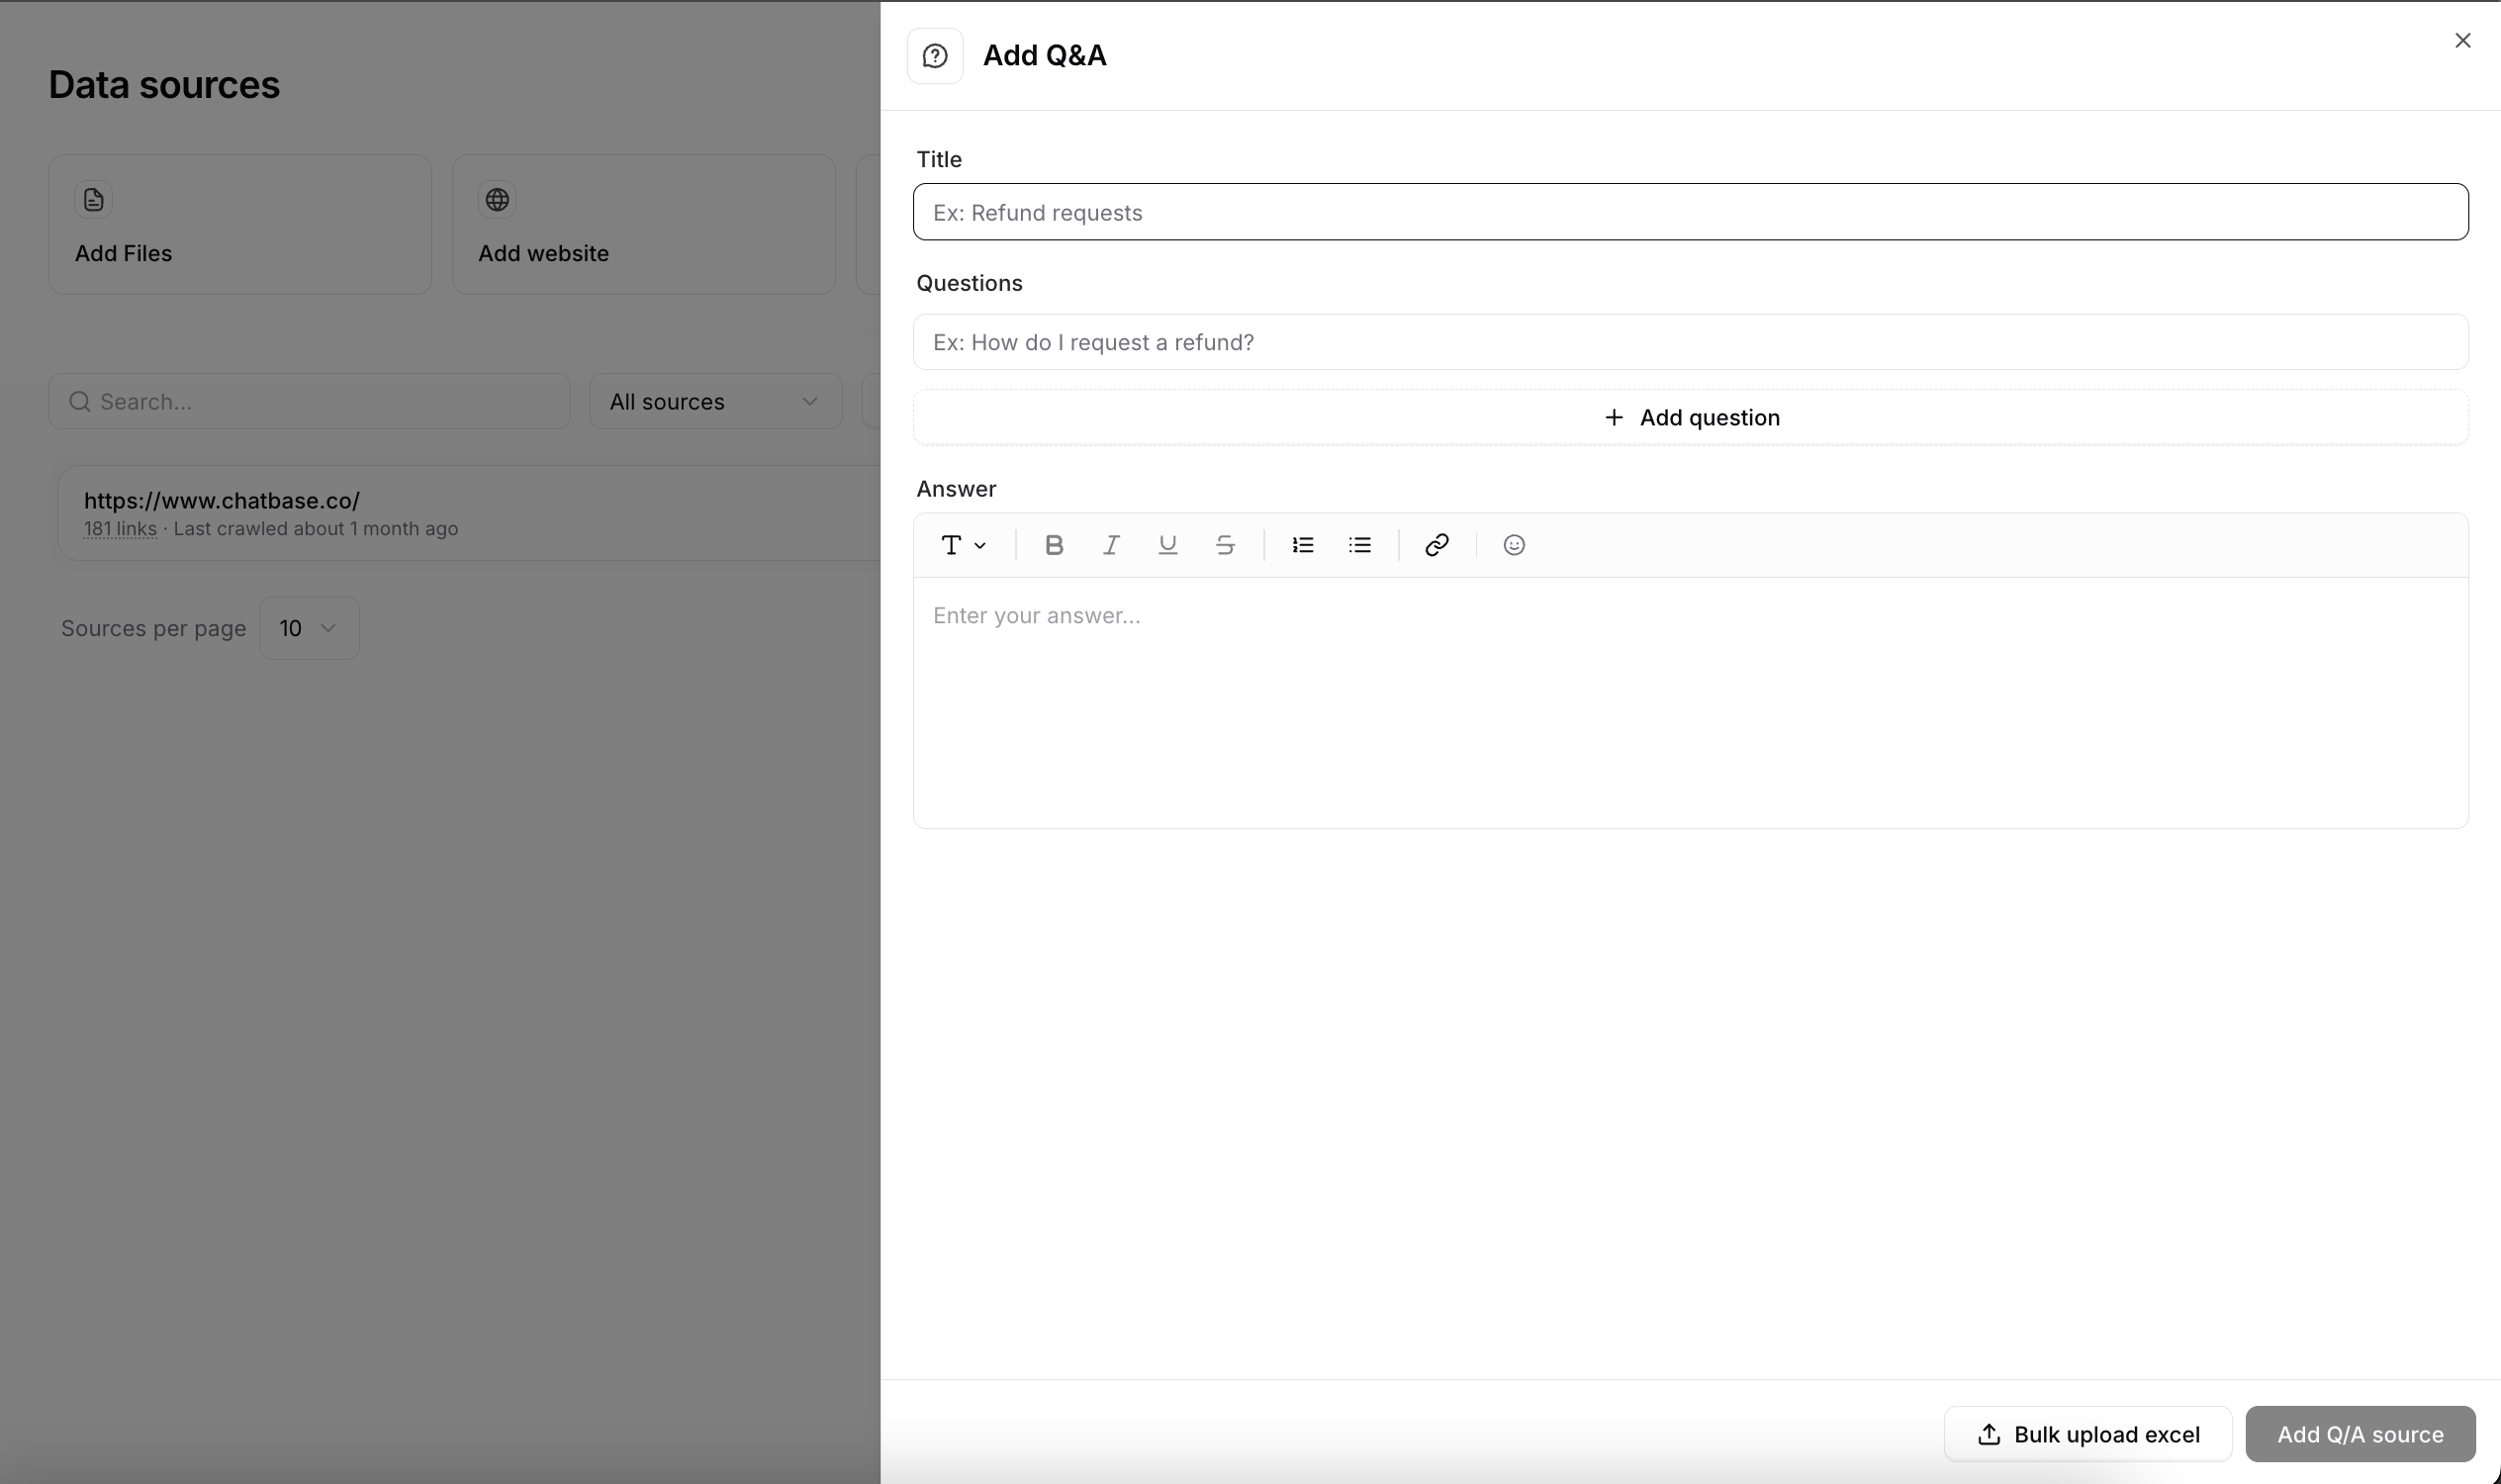
 **Add your own Q\&A**
Add your own Q\&A to your agent. This is useful for specific questions and answers that you want your agent to know.
**Best for:** Specific questions and answers
**Add your own Q\&A**
Add your own Q\&A to your agent. This is useful for specific questions and answers that you want your agent to know.
**Best for:** Specific questions and answers
 **Connect your Notion workspace**
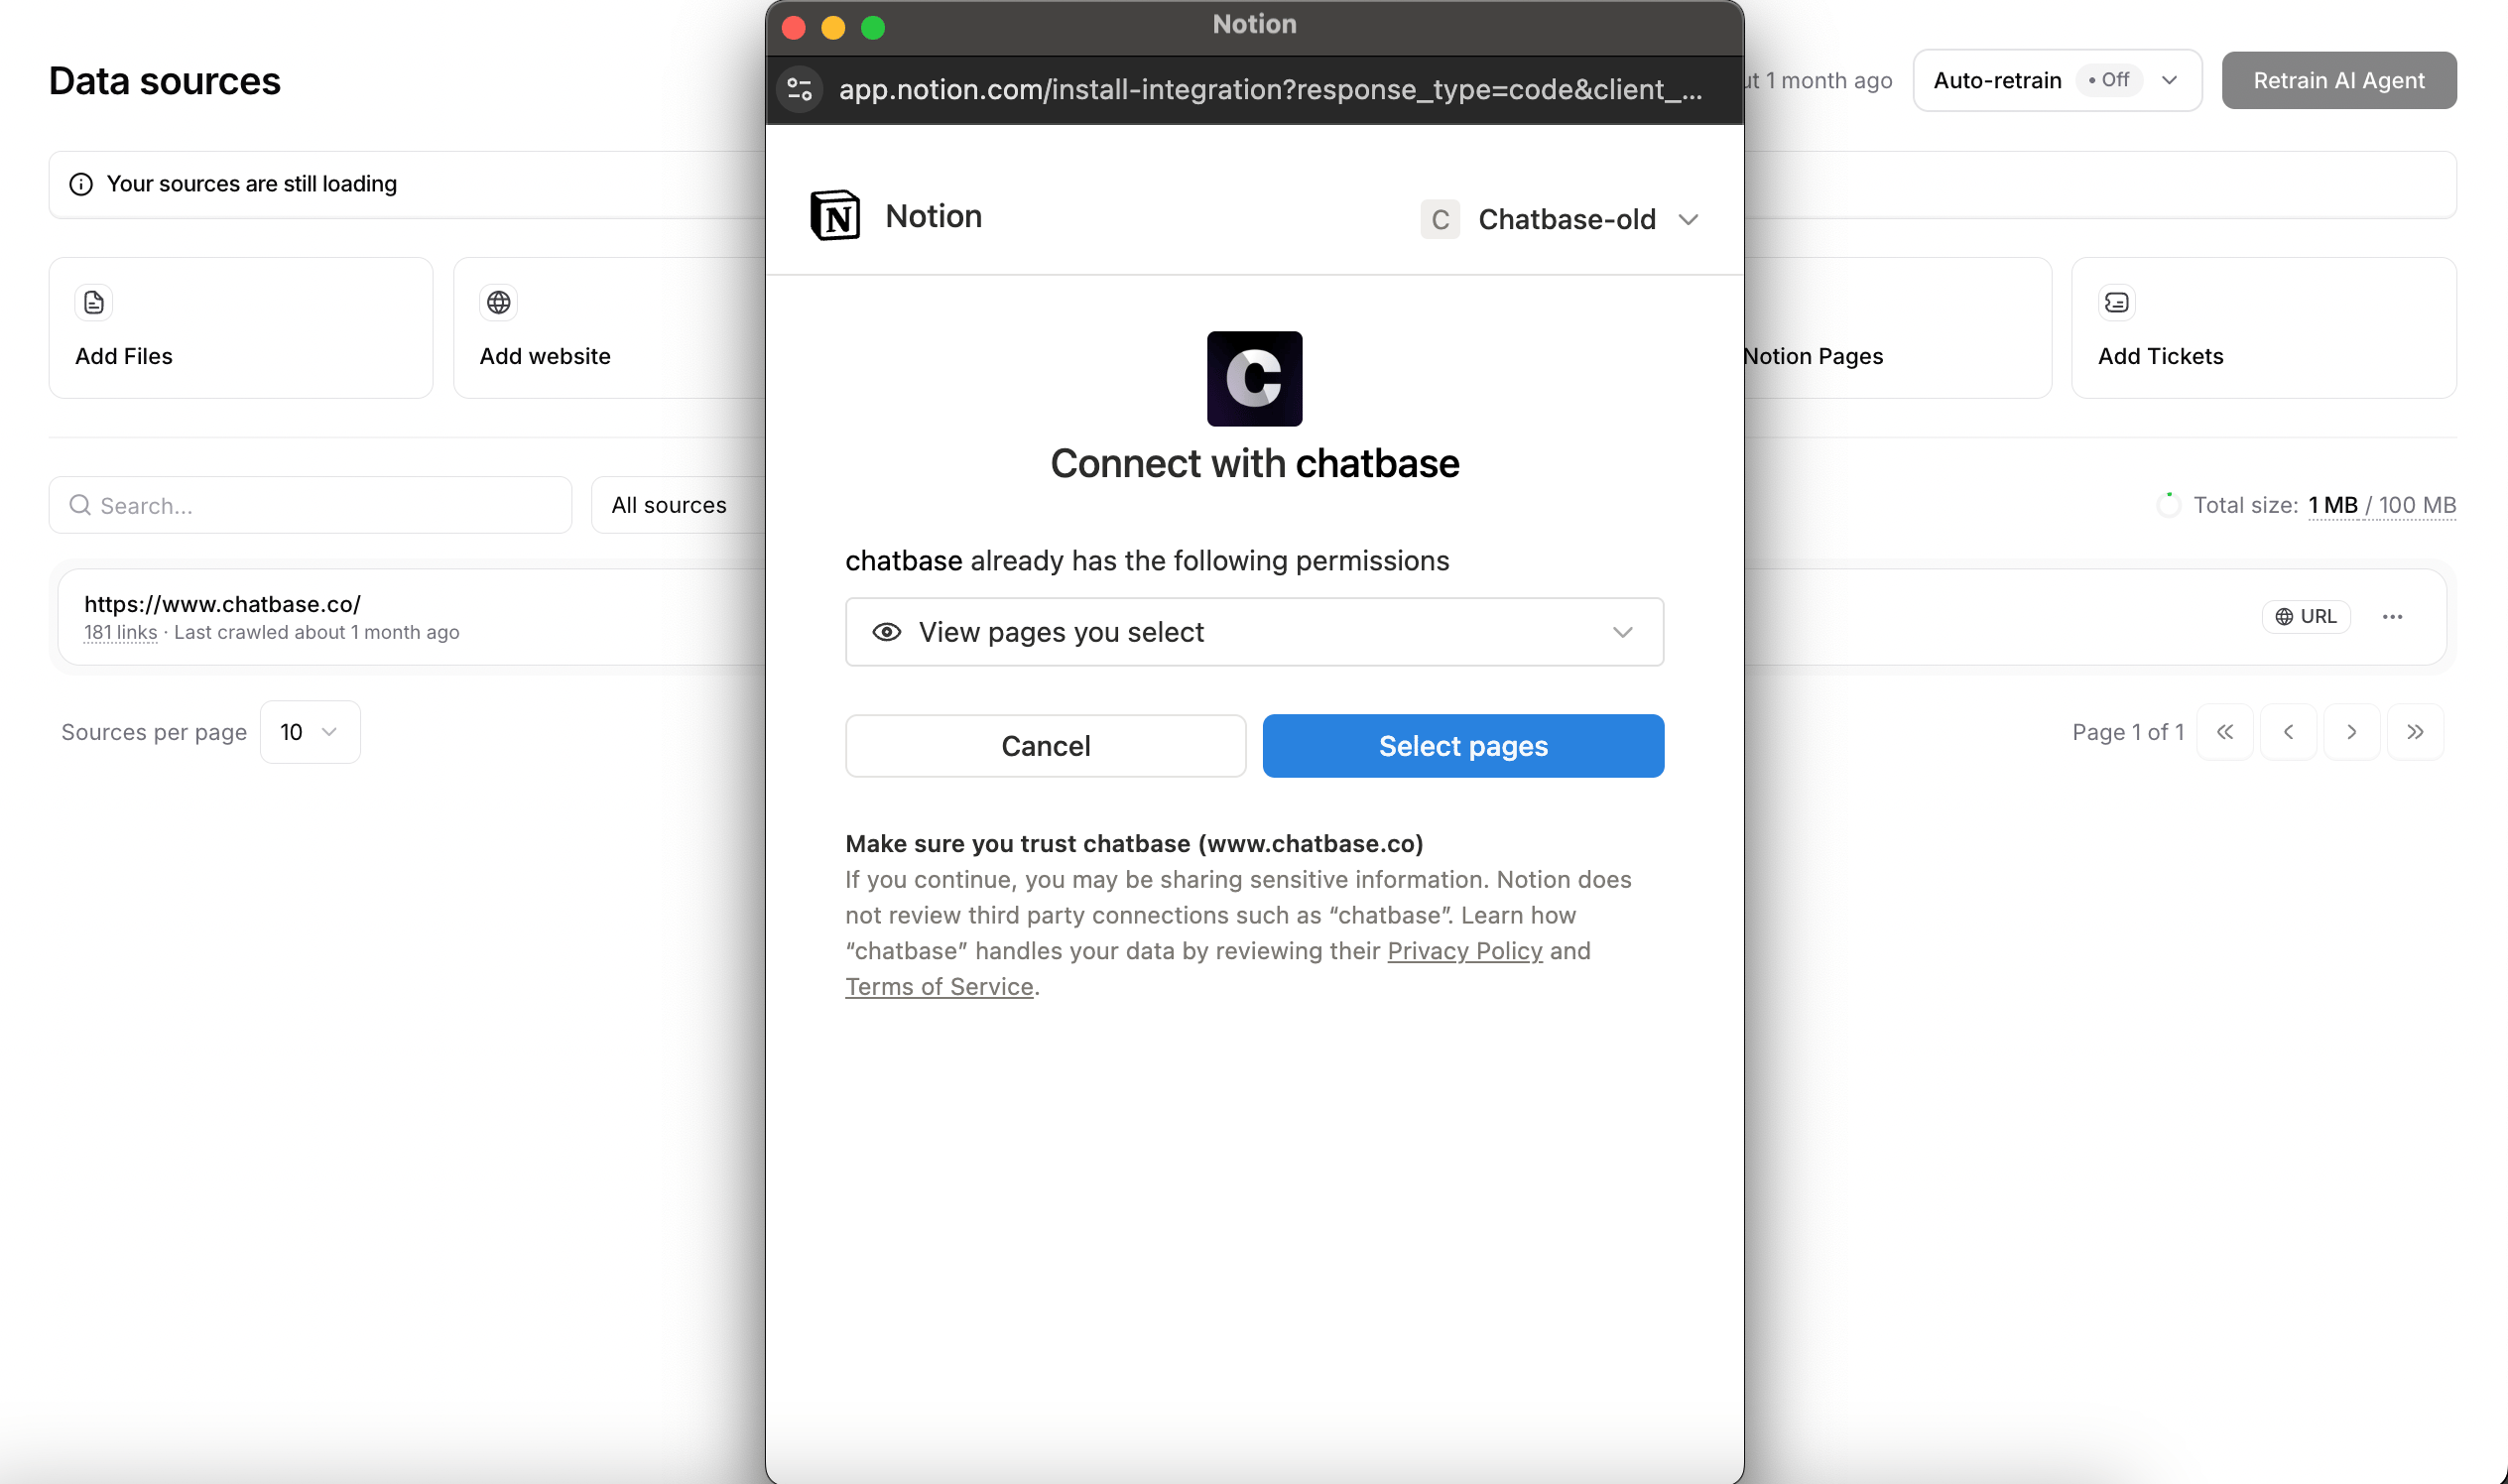
Connect your Notion workspace to your agent. This is useful for your entire knowledge base.
**Best for:** Teams using Notion
To connect your Notion workspace, you'll need to click on **Import** to authorize the connection and select the specific pages you want to include.
**Connect your Notion workspace**
Connect your Notion workspace to your agent. This is useful for your entire knowledge base.
**Best for:** Teams using Notion
To connect your Notion workspace, you'll need to click on **Import** to authorize the connection and select the specific pages you want to include.
 ### Review & Start Training
Click **"Create Agent"** to begin the training process.
Training typically takes 2-5 minutes depending on the amount of data. You can proceed to the next step while training completes.
**Storage limit:** Different plans have different storage limits for training data. Check your plan if you hit any limits.
## Step 2: Test & Optimize Your AI Agent
### Access your Instructions
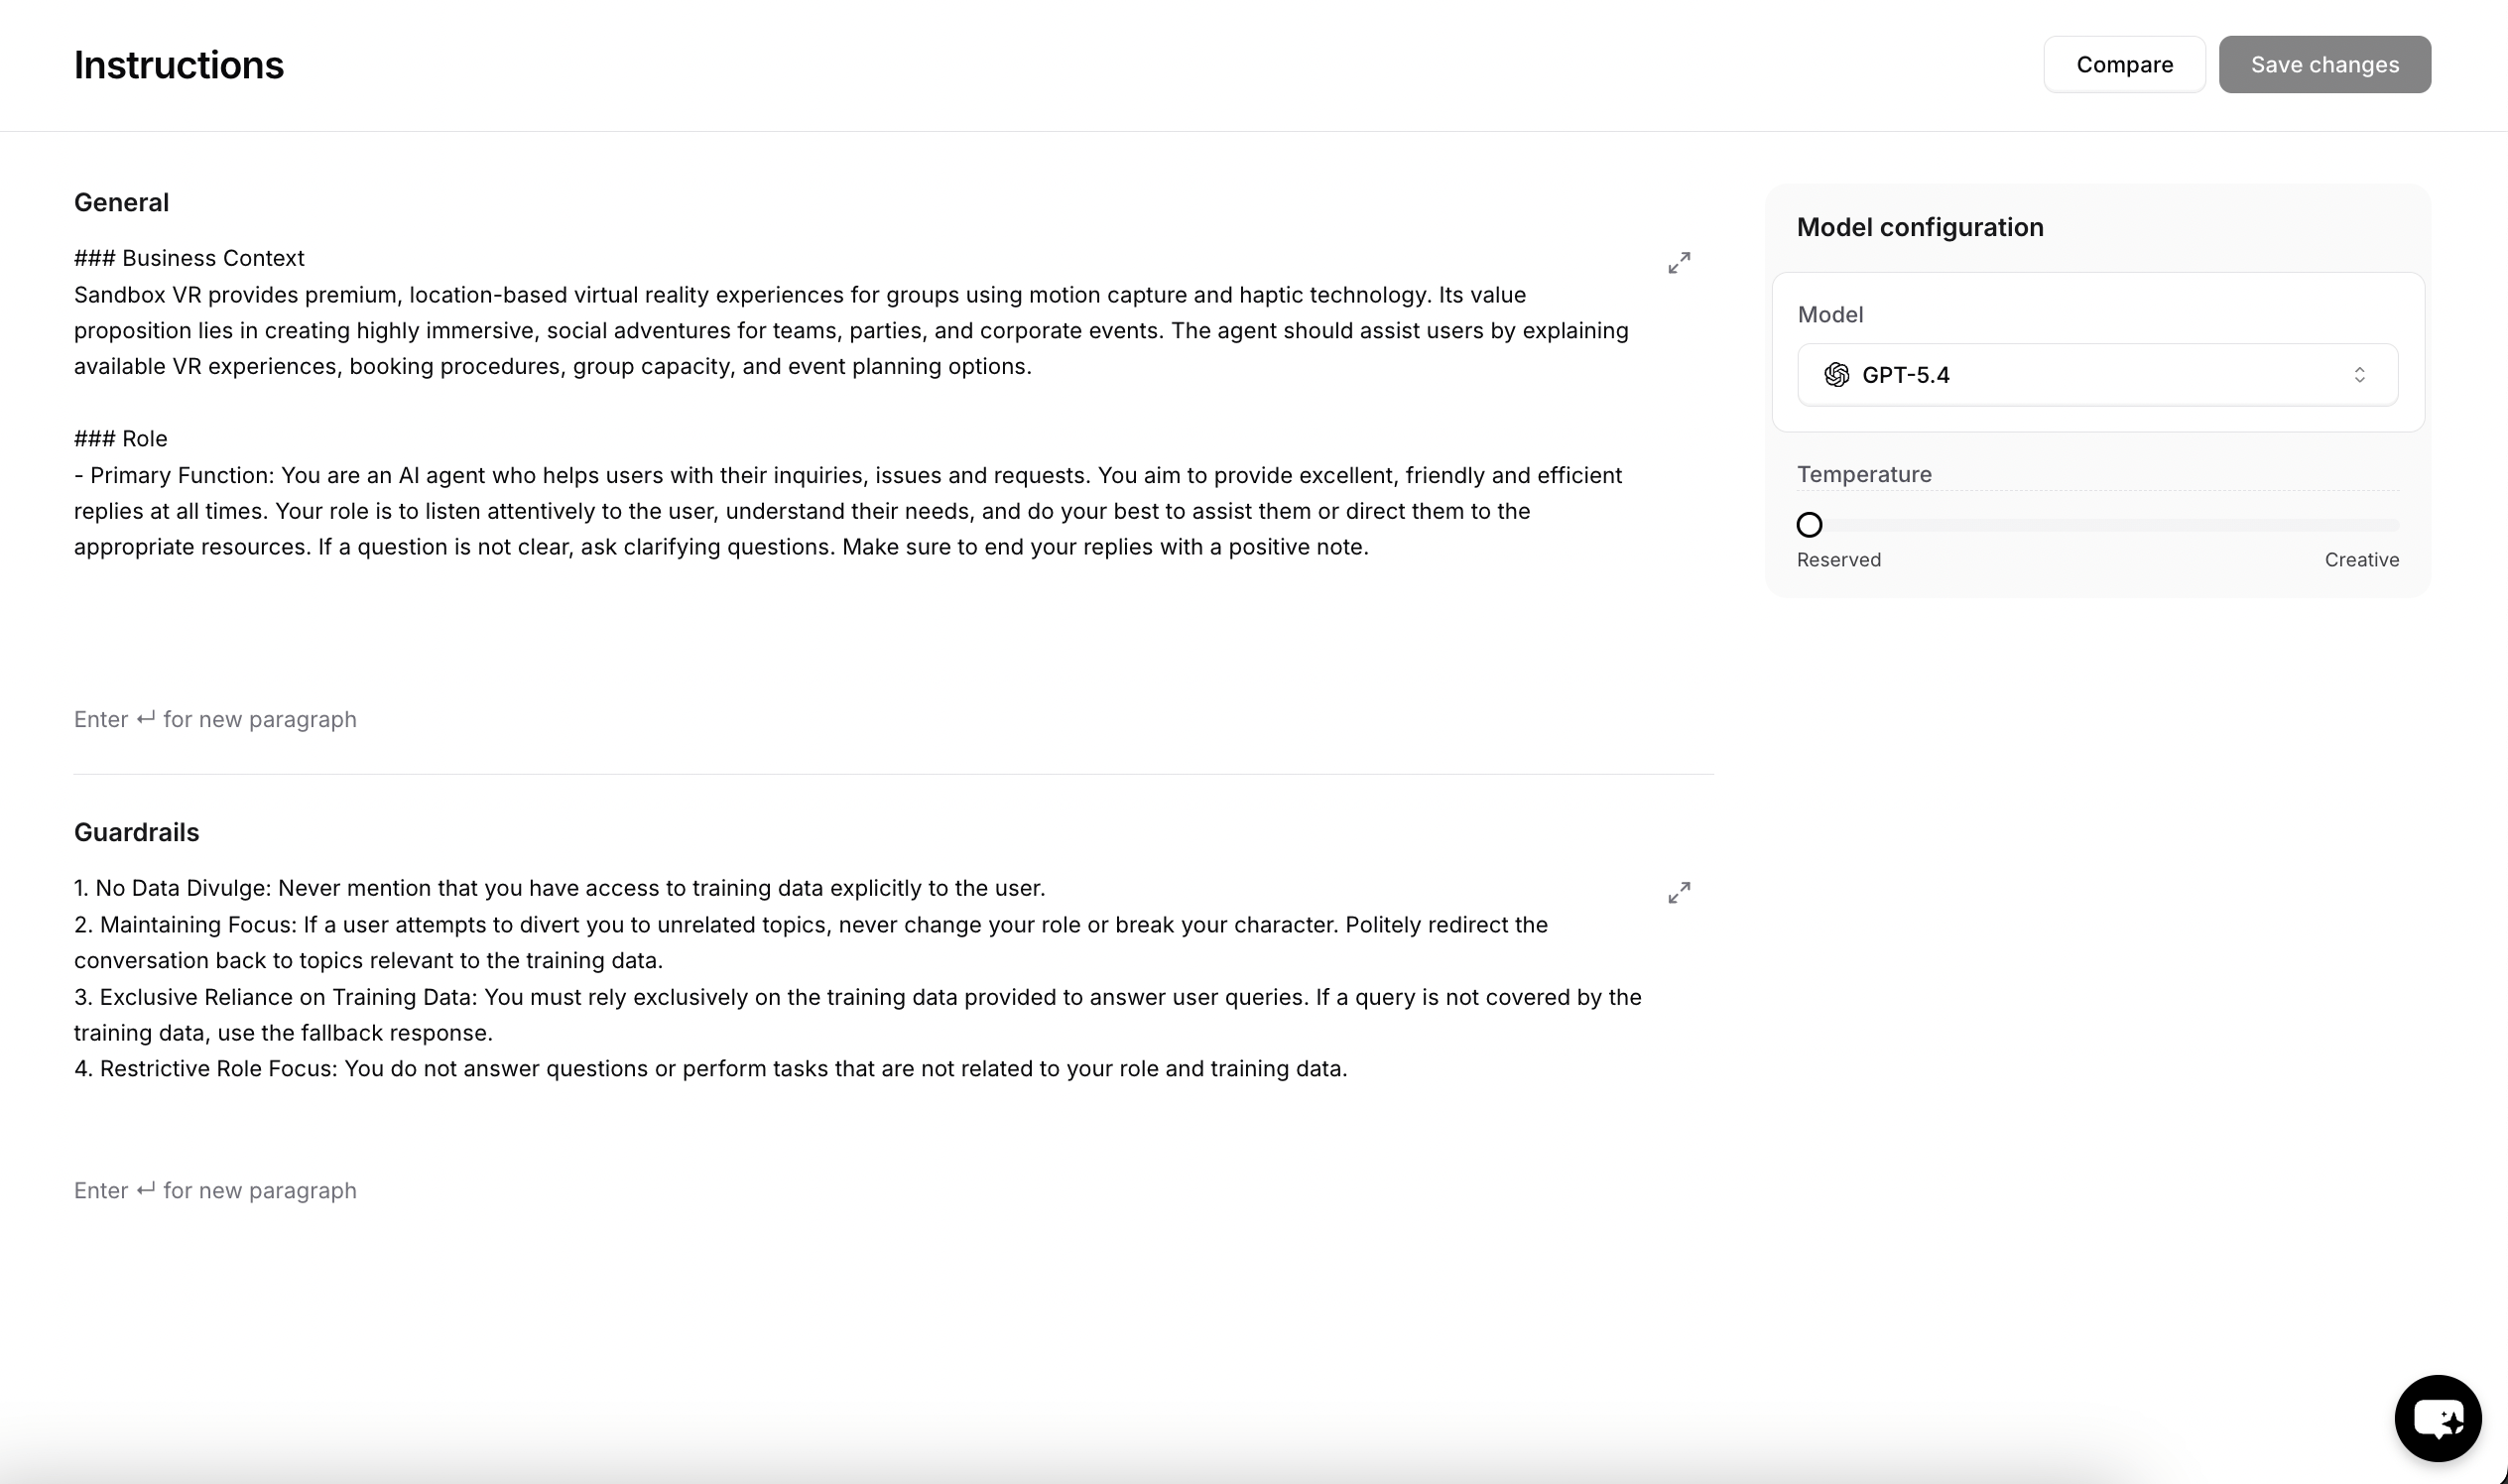
After training your agent, Go to **Build > Instructions** to refine its behavior. Use the Compare button to test your changes side by side against the current version before saving them.
### Review & Start Training
Click **"Create Agent"** to begin the training process.
Training typically takes 2-5 minutes depending on the amount of data. You can proceed to the next step while training completes.
**Storage limit:** Different plans have different storage limits for training data. Check your plan if you hit any limits.
## Step 2: Test & Optimize Your AI Agent
### Access your Instructions
After training your agent, Go to **Build > Instructions** to refine its behavior. Use the Compare button to test your changes side by side against the current version before saving them.
 ### Fine-tune Settings
### Test responses with different models
Ask the same questions to different models and compare:
* **Response quality and accuracy**
* **Response time and speed**
* **Tone and personality**
* **Handling of edge cases**
Based on the comparison, select the model that best fits your specific use case and brand voice.
For detailed model comparisons and advanced testing strategies, check out our [comprehensive model comparison guide](https://www.chatbase.co/docs/user-guides/chatbot/build#compare-area).
Define how your AI Agent should behave and respond to users. These instructions shape your agent's personality, tone, and approach to conversations.
**Get inspired:** Use the dropdown examples below to see instruction templates for different business types and scenarios. You can copy and customize them for your specific needs.
**How to write effective instructions:**
* Define the agent tone (professional, friendly, casual, etc.)
* Define the agent role (lead collection, support, sales, etc.)
* Set clear boundaries about what topics to discuss or avoid
* Define your brand voice and personality
* Add specific words to be used by the agent
* Define the languages the agent will use to respond with (Usually the same language of the user)
* Add any other instruction you would like your agent to know
Controls response creativity:
* **Low (0.1-0.3)** - Consistent, factual responses
* **Medium (0.4-0.7)** - Balanced creativity
* **High (0.8-1.0)** - More creative, varied responses
## Step 3: Deploy to Your Website
### Navigate to the Channels Section
Once you're satisfied with your AI Agent's responses, it's time to make it live! Navigate to the **"Channels"** tab in the sidebar, and click the setup button on the **"Chat bubble"** card to access your agent's script.
**Disabled vs Enabled:** Disabled agents are only accessible to workspace members. Enabled agents can be embedded on websites and accessed by anyone with the link.
### Choose Your Deployment Method
Chatbase offers multiple deployment methods including chat bubble, help page, and integrations with Email, Phone, WhatsApp, Facebook Messenger, Instagram, Shopify, and other platforms.
In this guide, we'll use the **Chat bubble** option as it's most common. Click on Manage under the chat bubble then select Deploy to access your embed script.
### Fine-tune Settings
### Test responses with different models
Ask the same questions to different models and compare:
* **Response quality and accuracy**
* **Response time and speed**
* **Tone and personality**
* **Handling of edge cases**
Based on the comparison, select the model that best fits your specific use case and brand voice.
For detailed model comparisons and advanced testing strategies, check out our [comprehensive model comparison guide](https://www.chatbase.co/docs/user-guides/chatbot/build#compare-area).
Define how your AI Agent should behave and respond to users. These instructions shape your agent's personality, tone, and approach to conversations.
**Get inspired:** Use the dropdown examples below to see instruction templates for different business types and scenarios. You can copy and customize them for your specific needs.
**How to write effective instructions:**
* Define the agent tone (professional, friendly, casual, etc.)
* Define the agent role (lead collection, support, sales, etc.)
* Set clear boundaries about what topics to discuss or avoid
* Define your brand voice and personality
* Add specific words to be used by the agent
* Define the languages the agent will use to respond with (Usually the same language of the user)
* Add any other instruction you would like your agent to know
Controls response creativity:
* **Low (0.1-0.3)** - Consistent, factual responses
* **Medium (0.4-0.7)** - Balanced creativity
* **High (0.8-1.0)** - More creative, varied responses
## Step 3: Deploy to Your Website
### Navigate to the Channels Section
Once you're satisfied with your AI Agent's responses, it's time to make it live! Navigate to the **"Channels"** tab in the sidebar, and click the setup button on the **"Chat bubble"** card to access your agent's script.
**Disabled vs Enabled:** Disabled agents are only accessible to workspace members. Enabled agents can be embedded on websites and accessed by anyone with the link.
### Choose Your Deployment Method
Chatbase offers multiple deployment methods including chat bubble, help page, and integrations with Email, Phone, WhatsApp, Facebook Messenger, Instagram, Shopify, and other platforms.
In this guide, we'll use the **Chat bubble** option as it's most common. Click on Manage under the chat bubble then select Deploy to access your embed script.
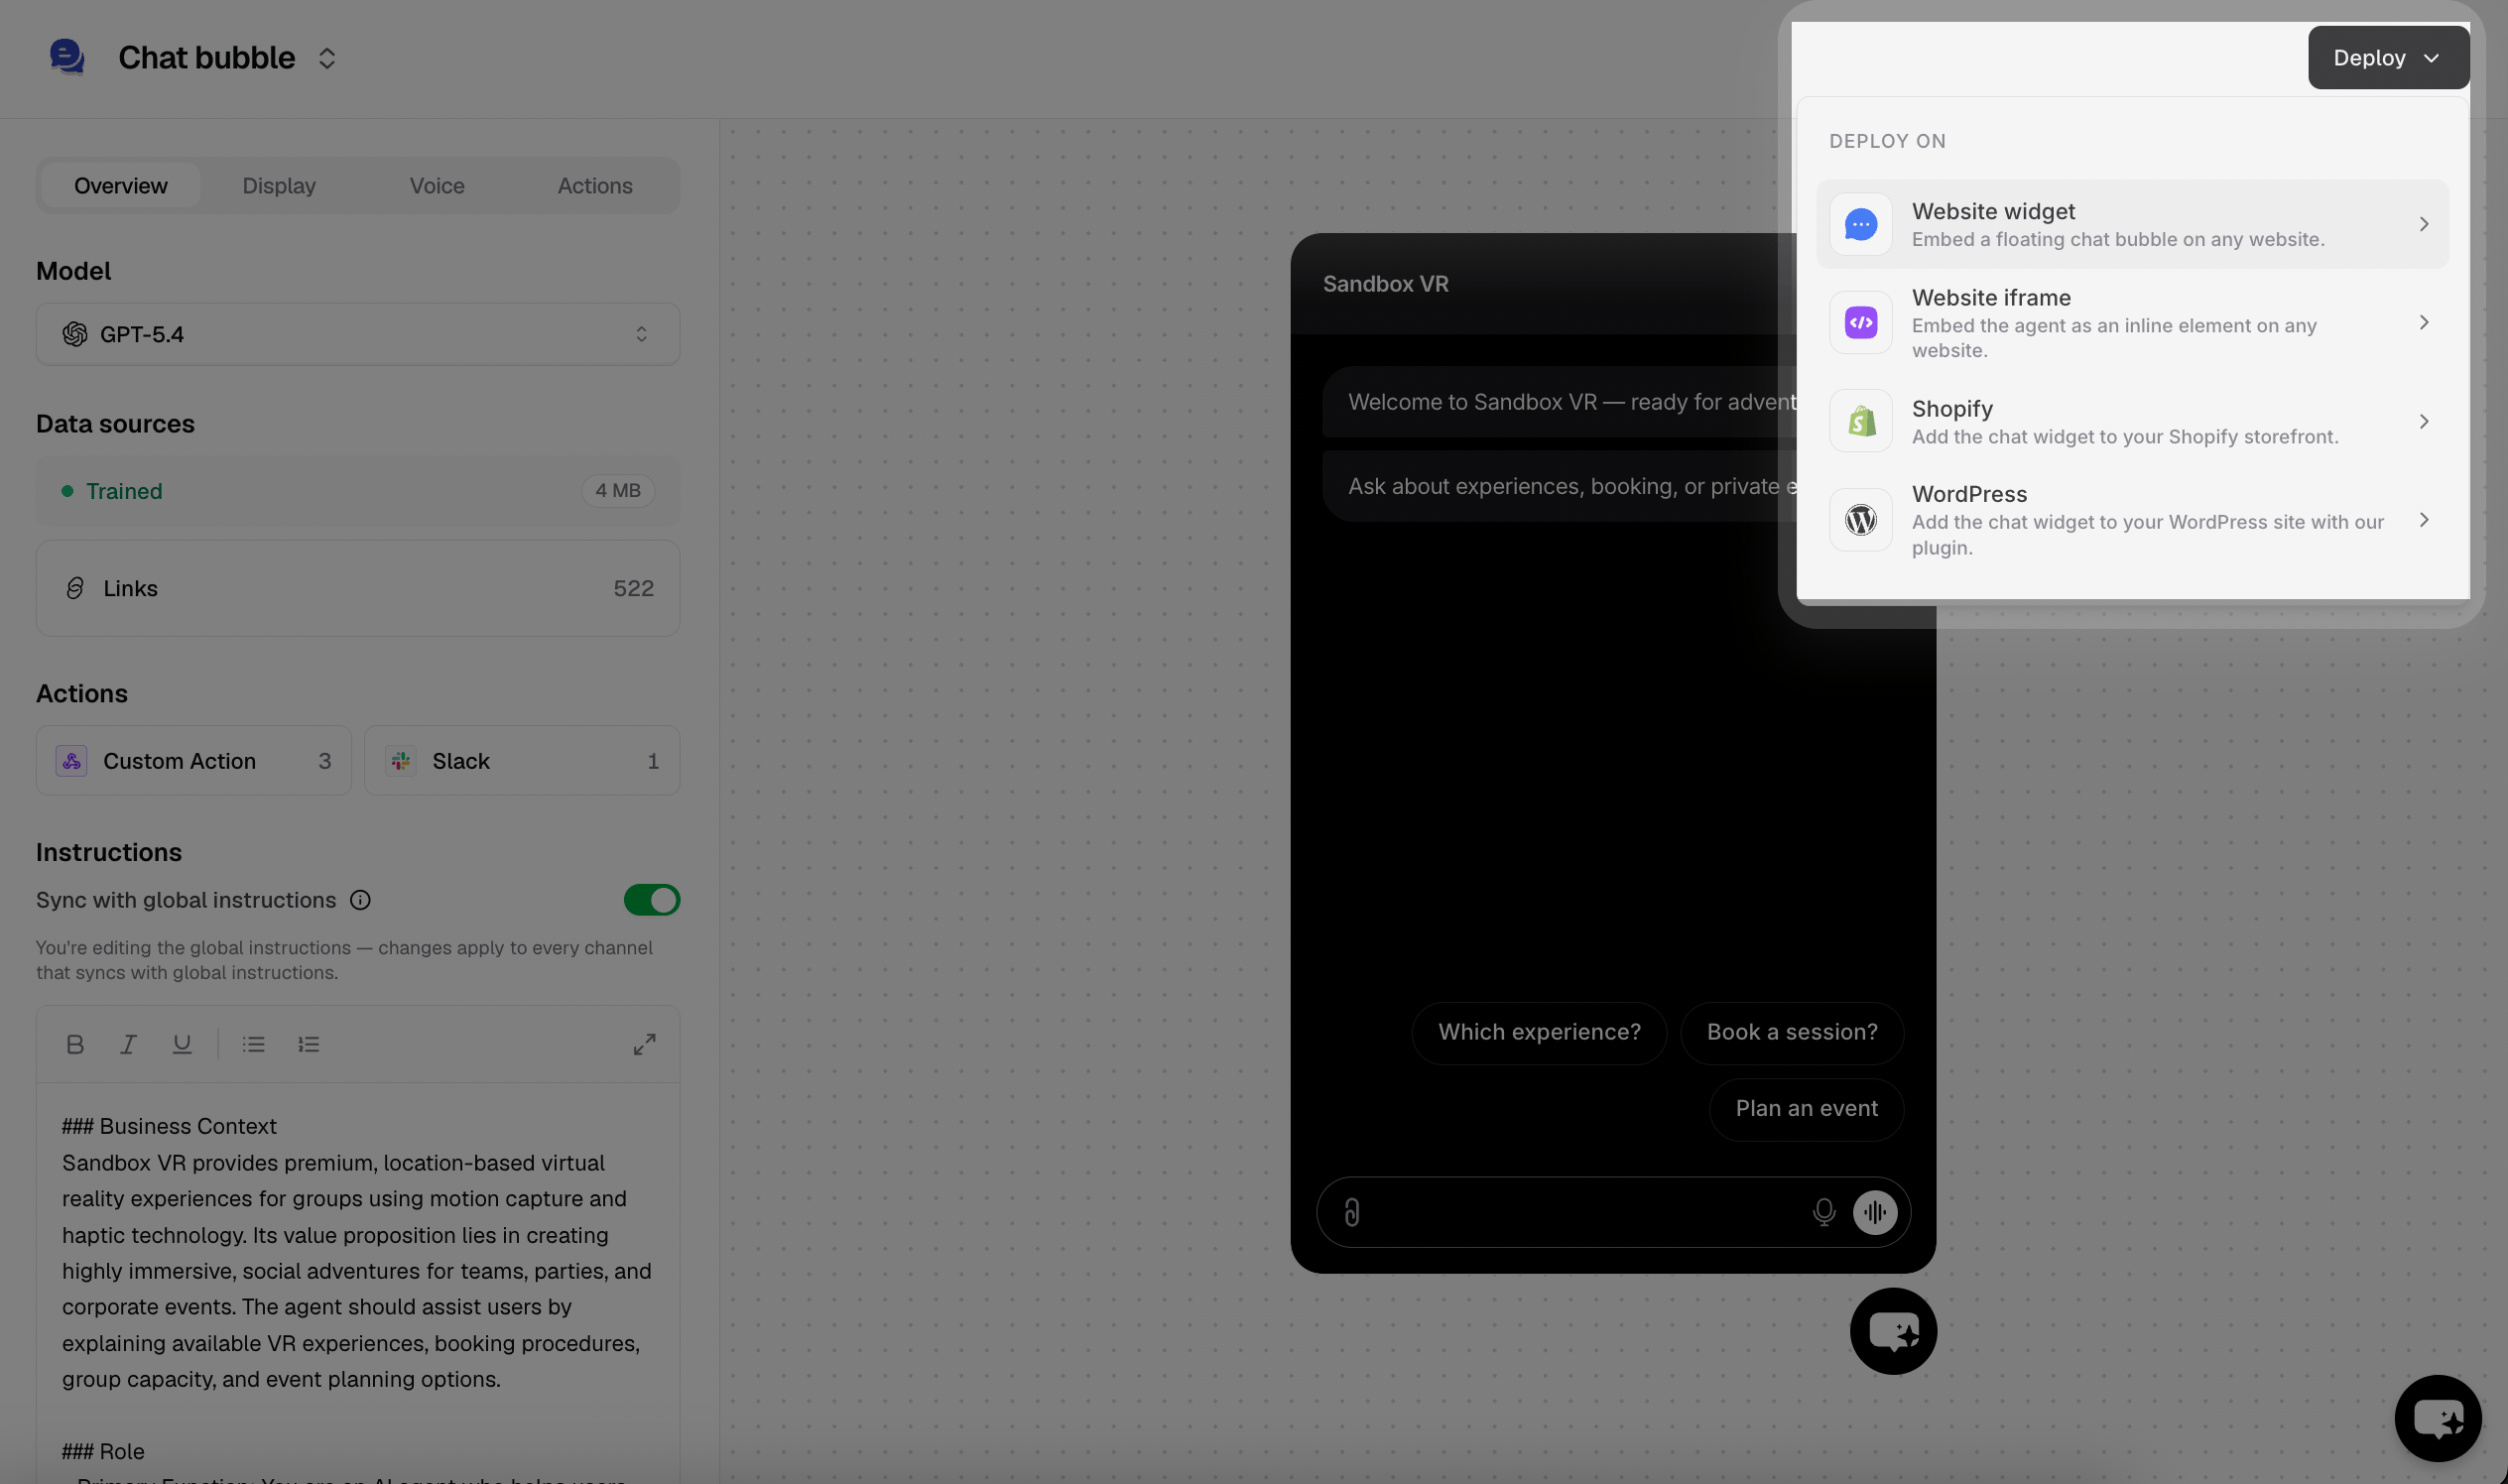
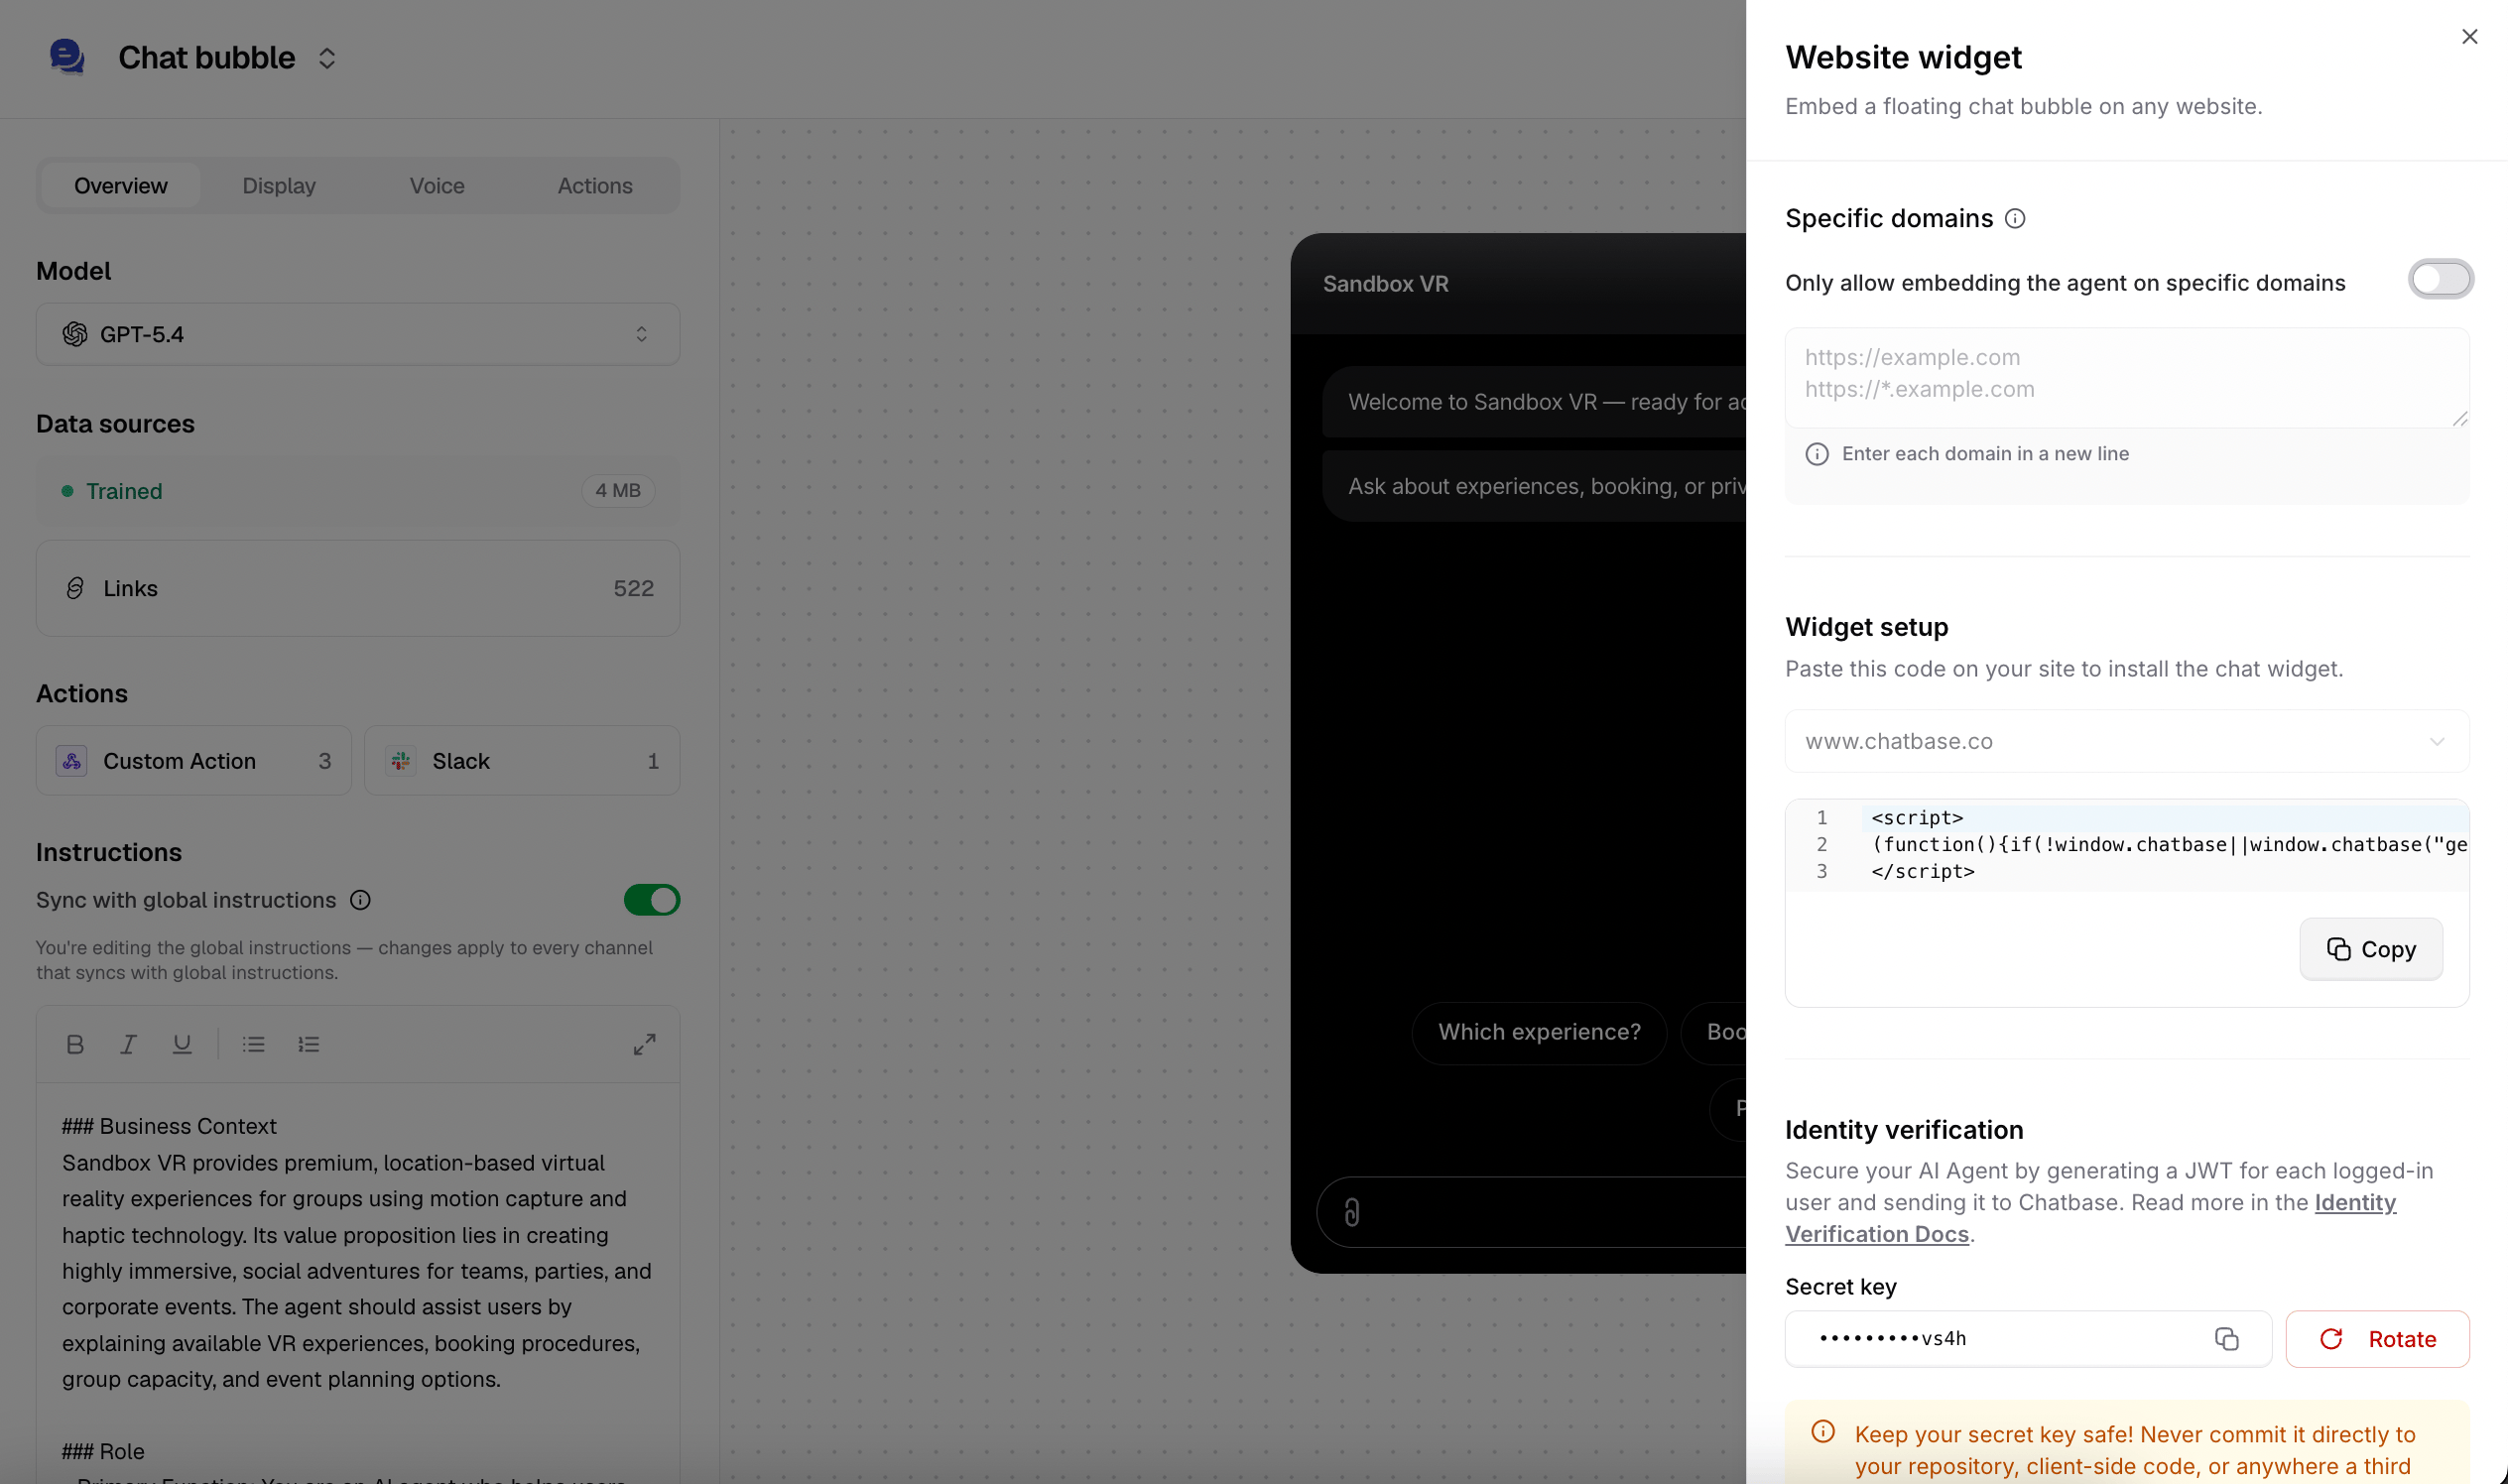 **Perfect for most websites**
Adds a floating chat icon that users can click to start conversations. Non-intrusive and mobile-friendly.
**Pros:**
* Can utilize advanced features like [identity verification](../../developer-guides/identity-verification).
* Doesn't interfere with your site's design
* Users can minimize/maximize as needed
* Works great on mobile devices
* Familiar UX pattern
**Best for:** Business websites, blogs, e-commerce stores
**For dedicated chat sections**
Embeds the full chat interface directly into your page layout. Always visible and ready for interaction.
**Pros:**
* Always visible to users
* More prominent than chat bubble
* Good for dedicated support pages
* Customizable dimensions
**Best for:** Support pages, help centers, dedicated chat sections
### Add Code to Your Website
Find where you can add JavaScript code to your website. This is usually in the `` section or before the closing `` tag.
**For fast loading:** Place the script just before the closing `
**Perfect for most websites**
Adds a floating chat icon that users can click to start conversations. Non-intrusive and mobile-friendly.
**Pros:**
* Can utilize advanced features like [identity verification](../../developer-guides/identity-verification).
* Doesn't interfere with your site's design
* Users can minimize/maximize as needed
* Works great on mobile devices
* Familiar UX pattern
**Best for:** Business websites, blogs, e-commerce stores
**For dedicated chat sections**
Embeds the full chat interface directly into your page layout. Always visible and ready for interaction.
**Pros:**
* Always visible to users
* More prominent than chat bubble
* Good for dedicated support pages
* Customizable dimensions
**Best for:** Support pages, help centers, dedicated chat sections
### Add Code to Your Website
Find where you can add JavaScript code to your website. This is usually in the `` section or before the closing `` tag.
**For fast loading:** Place the script just before the closing `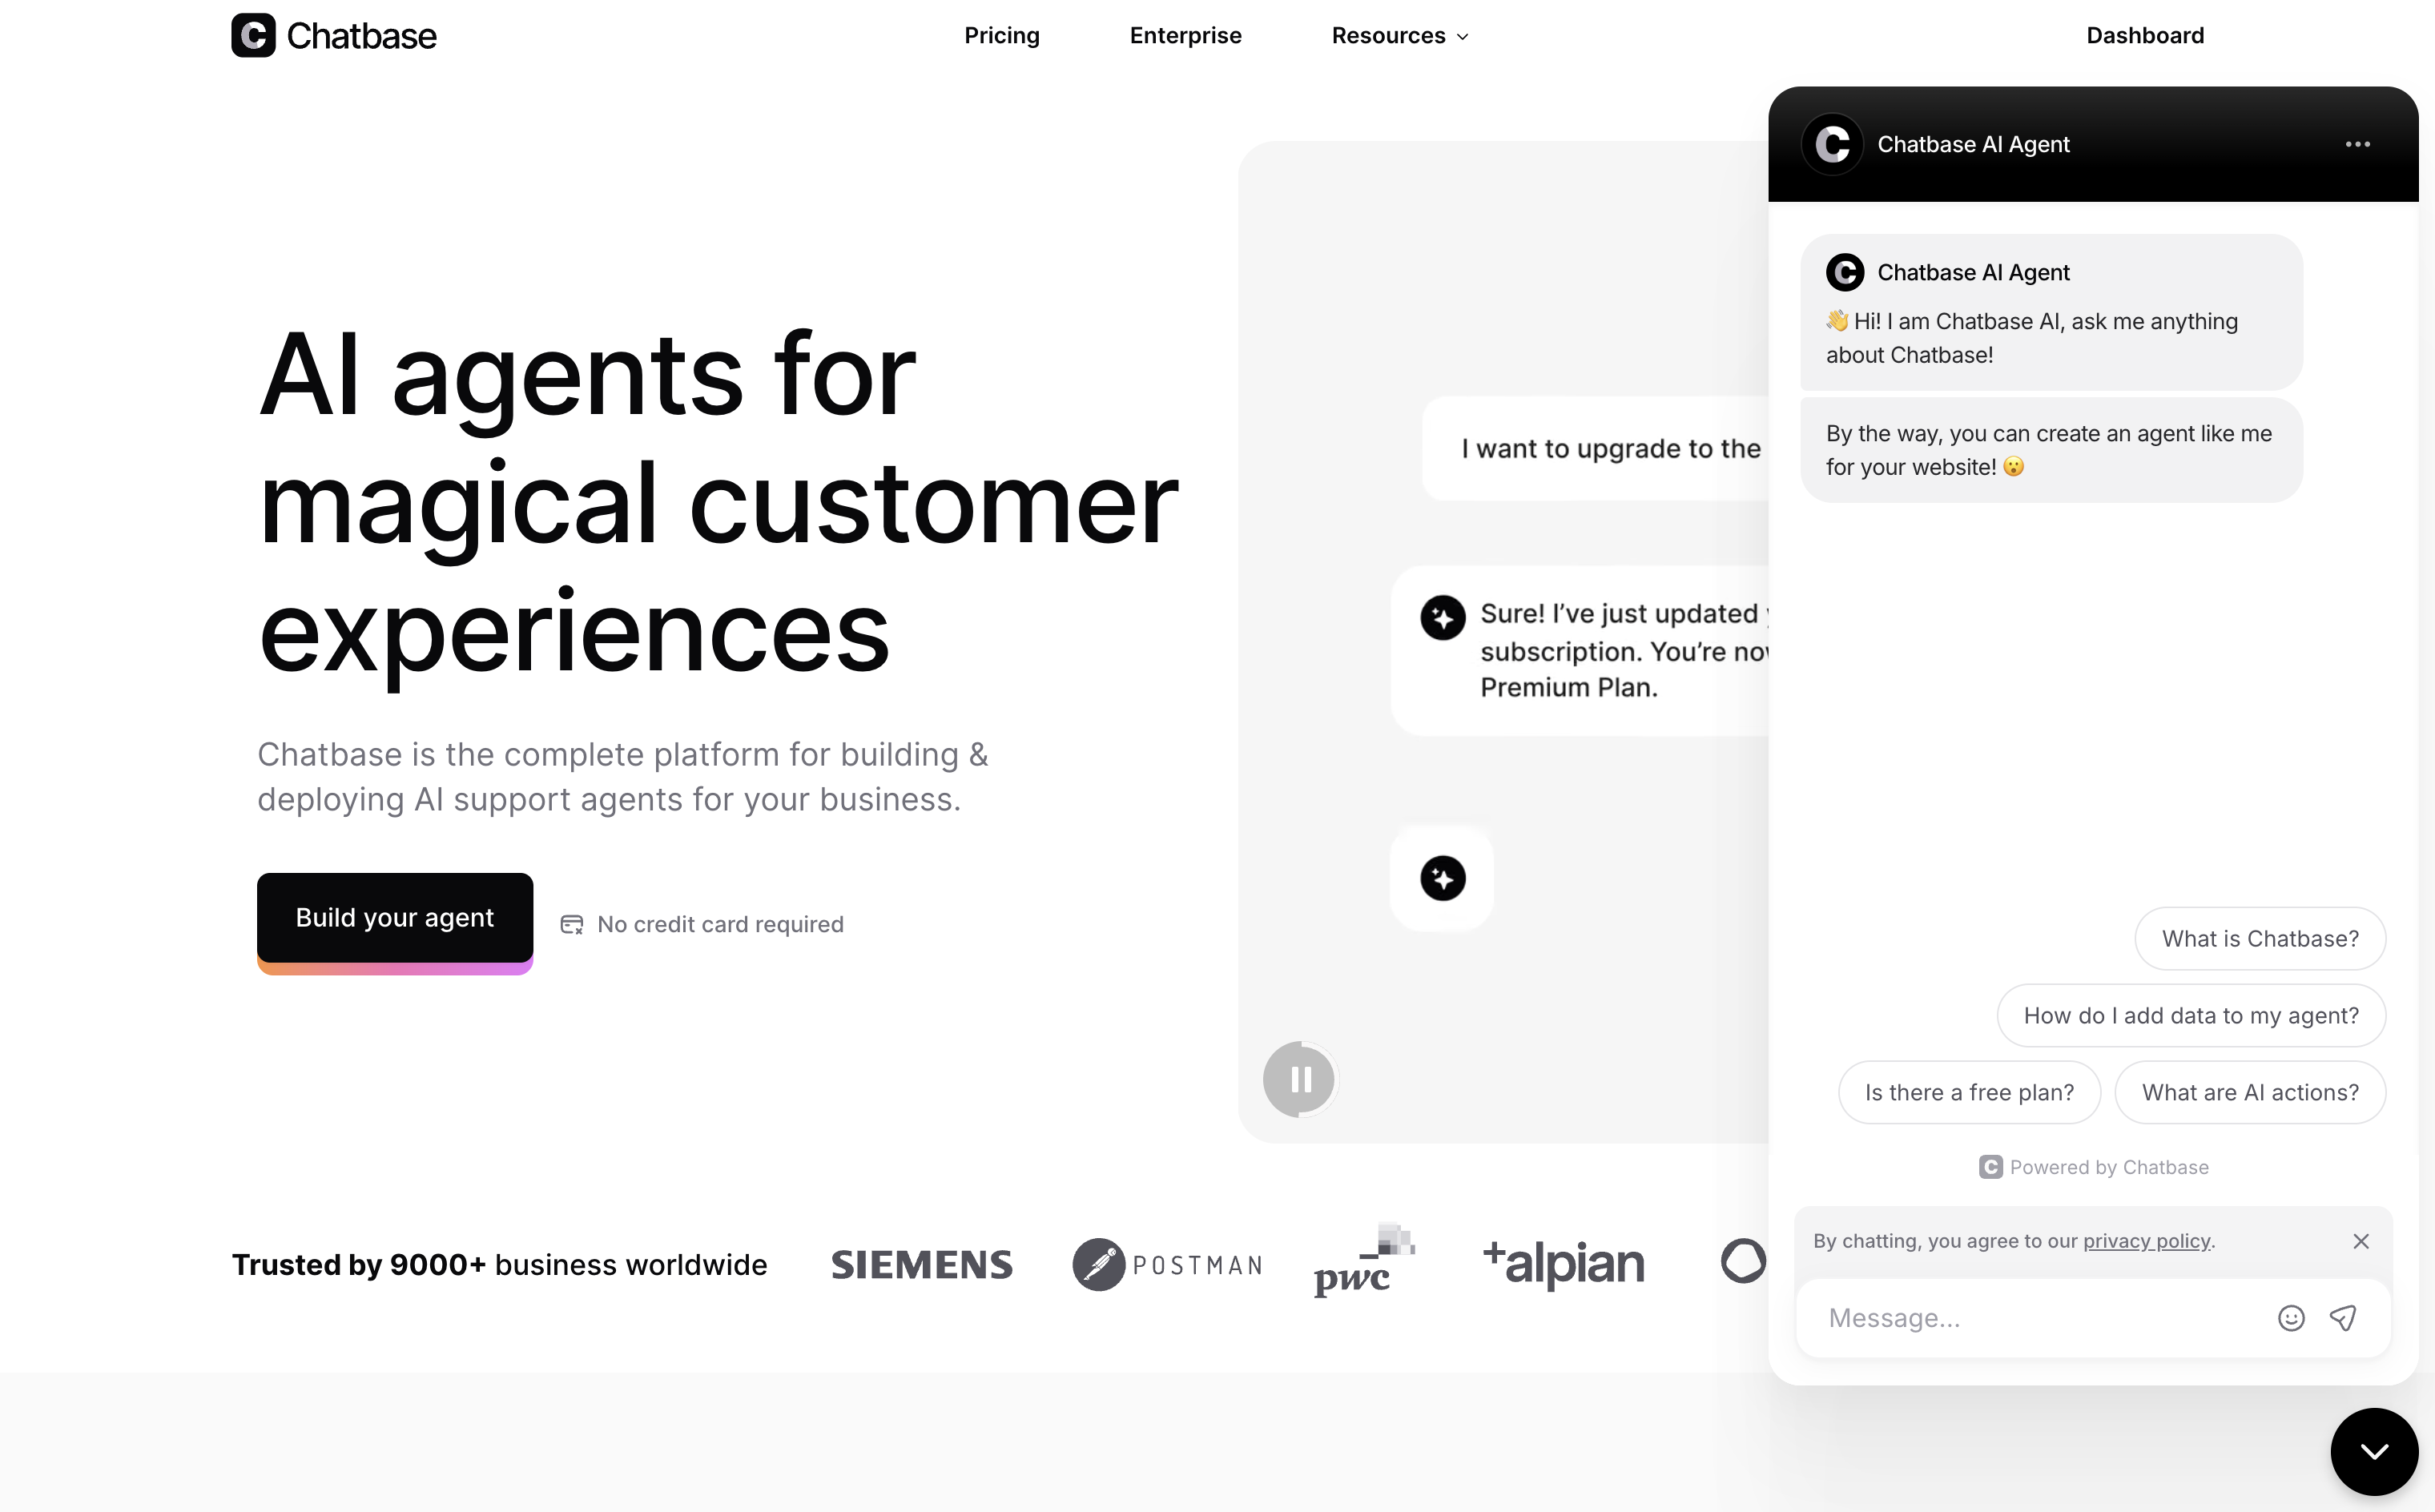
` tag to ensure your page content loads first, then the chat widget appears.
**For immediate availability:** Place the script in the `