> ## Documentation Index
> Fetch the complete documentation index at: https://chatbase.co/docs/llms.txt
> Use this file to discover all available pages before exploring further.
# Wix
## Step 1: Set Up Your Chatbase AI agent
To begin the integration process, you'll need to sign into your Chatbase account. If you haven't created an account yet, [sign up for a free account](https://www.chatbase.co/auth/signup). Once logged in, proceed to set up your agent by uploading relevant data sources. These data sources can include files, text snippets, websites, or question-and-answer pairs, which will form the knowledge base for your agent.
If you need help with setting up a functional Chatbase agent, here is a [step-by-step guide for setting up and deploying your Chatbase agent](/docs/user-guides/quick-start/your-first-agent).
## Step 2: Generate and Copy the Chatbase AI agent Embed Code
1\. After configuring your agent, navigate to your [**dashboard**](https://www.chatbase.co/dashboard/) page and select the specific agent you wish to embed.
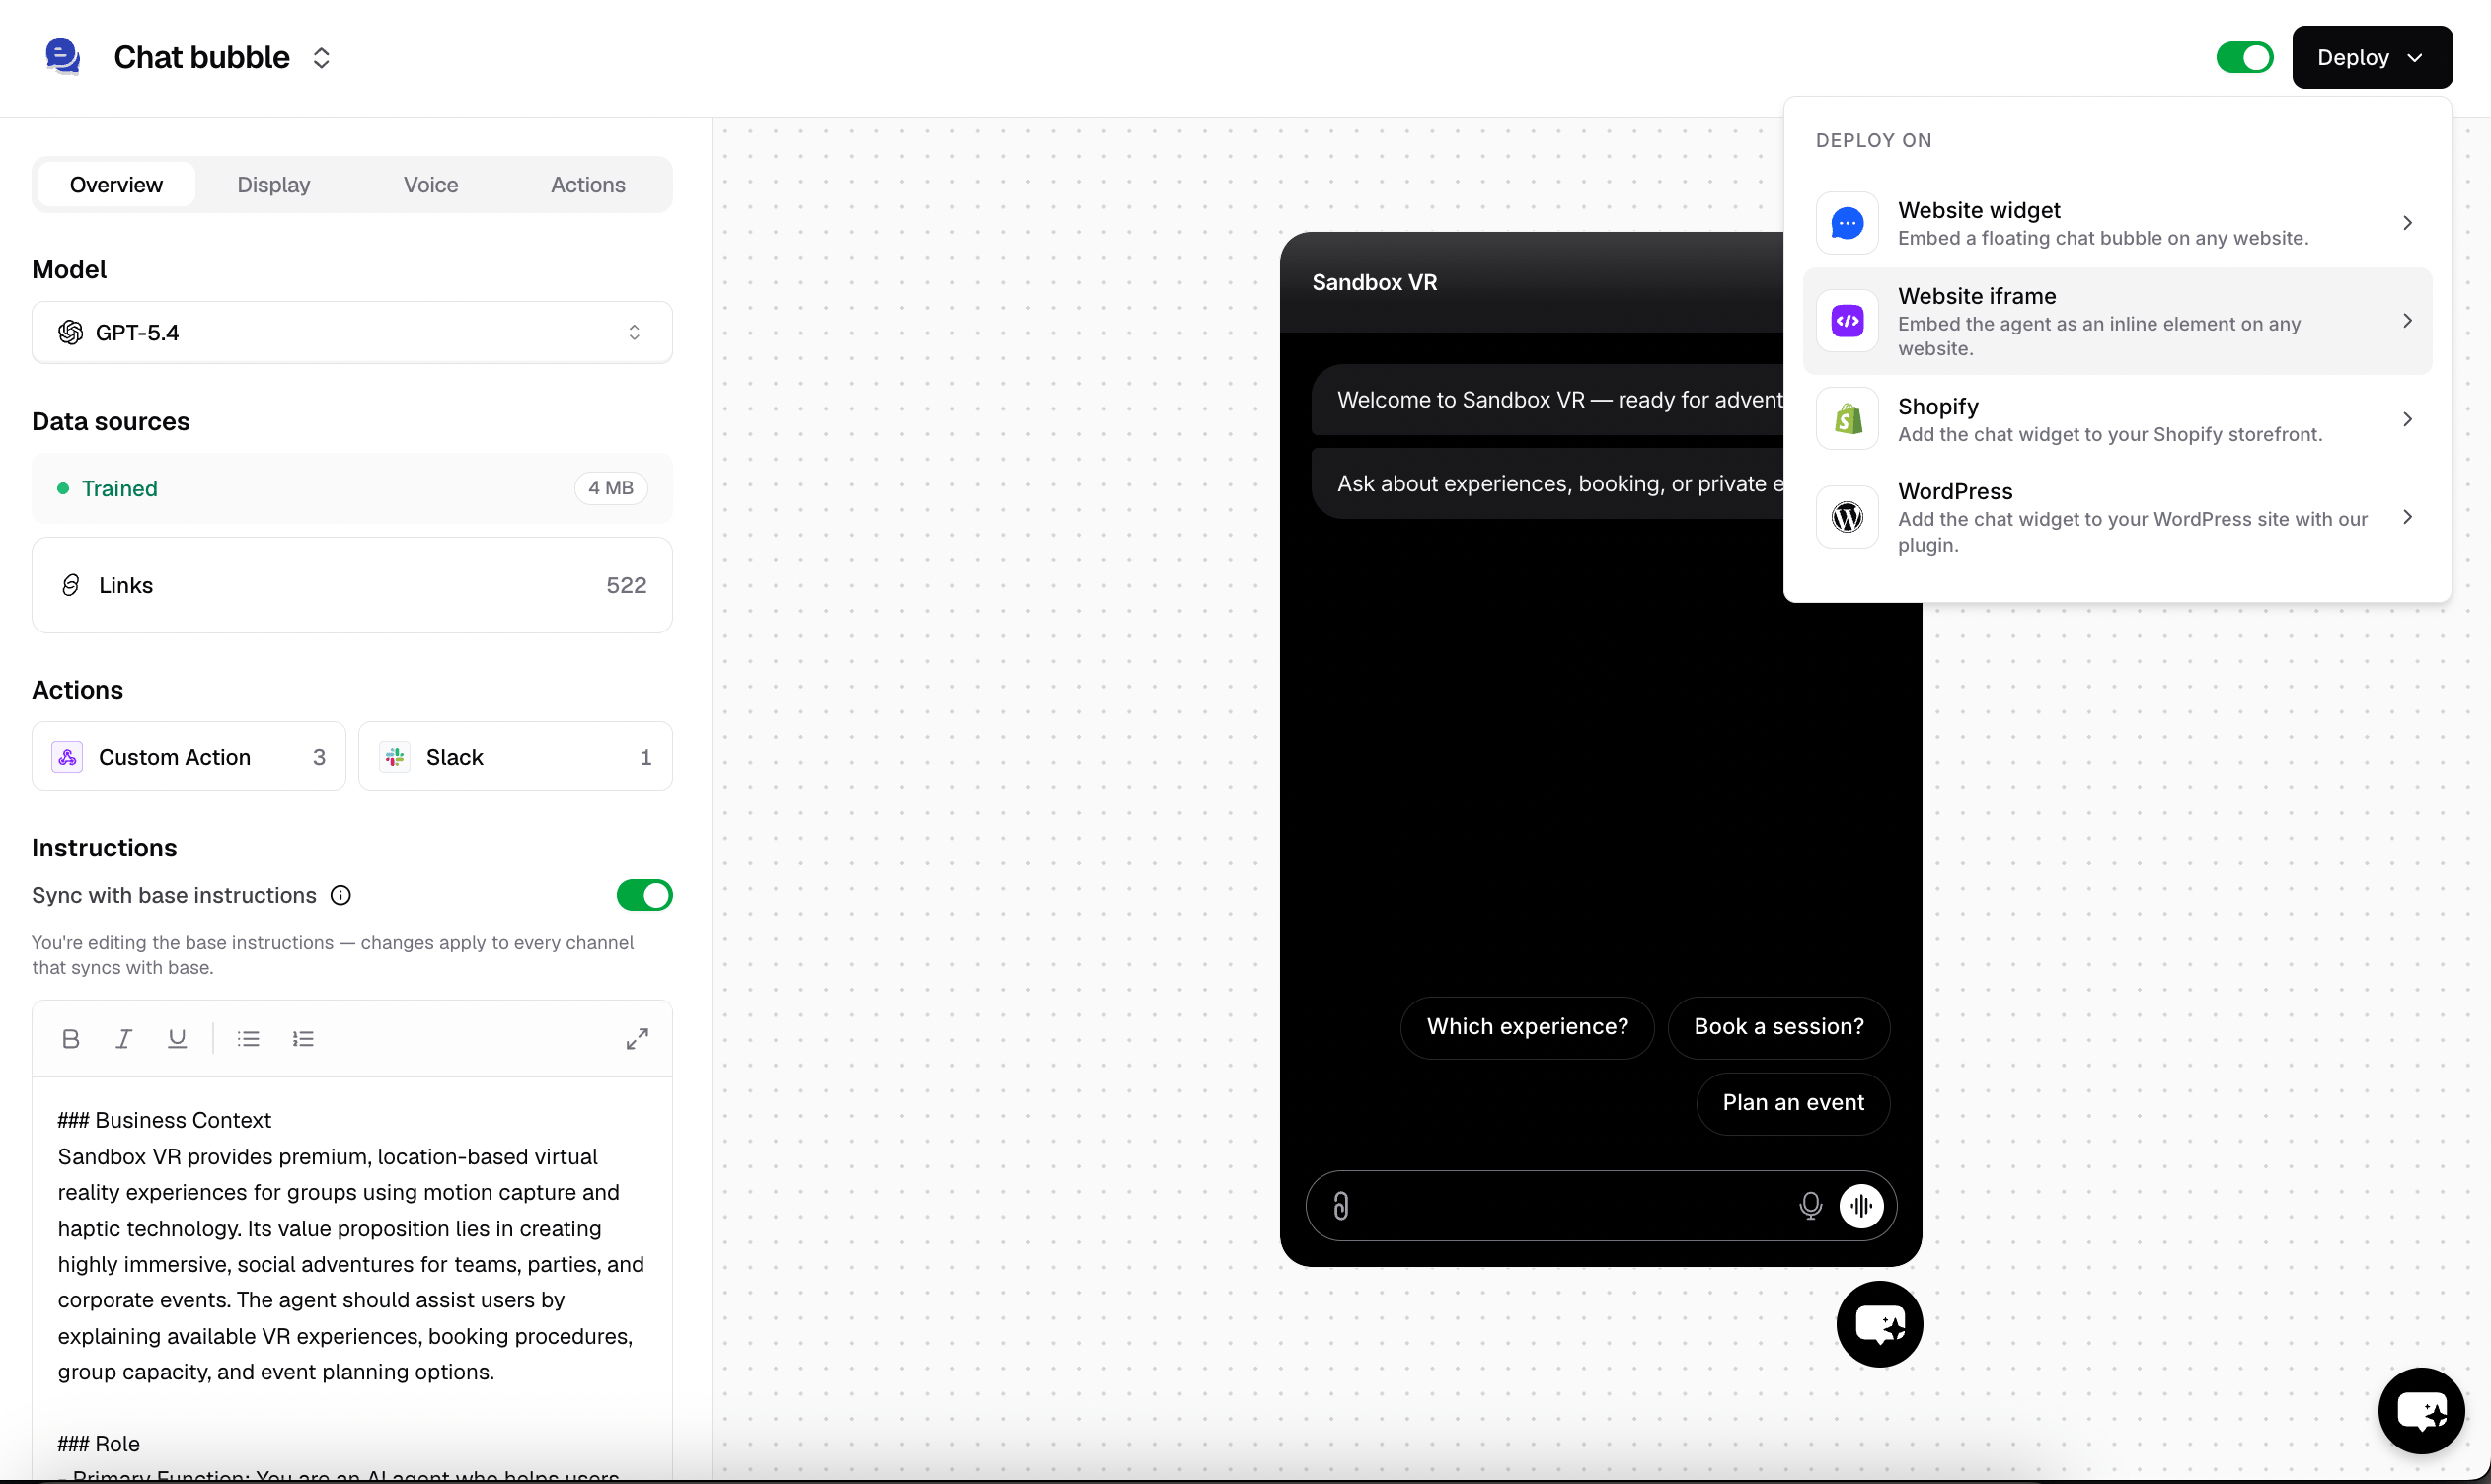
2\. Click **Channels** in the left sidebar, then click **Manage** on the **Chat bubble** card (or **Setup**, if you haven't configured it yet).
3\. Click on **Deploy** and select the **Website widget** embed type. Scroll down and Click **Copy** to copy the provided script.
 With the embed code in hand, you are now ready to proceed with the integration process within your Wix application.
## Step 3: Sign Into Your Wix Account and Embed Your AI agent
1\. Sign in to your Wix website and head to your dashboard.
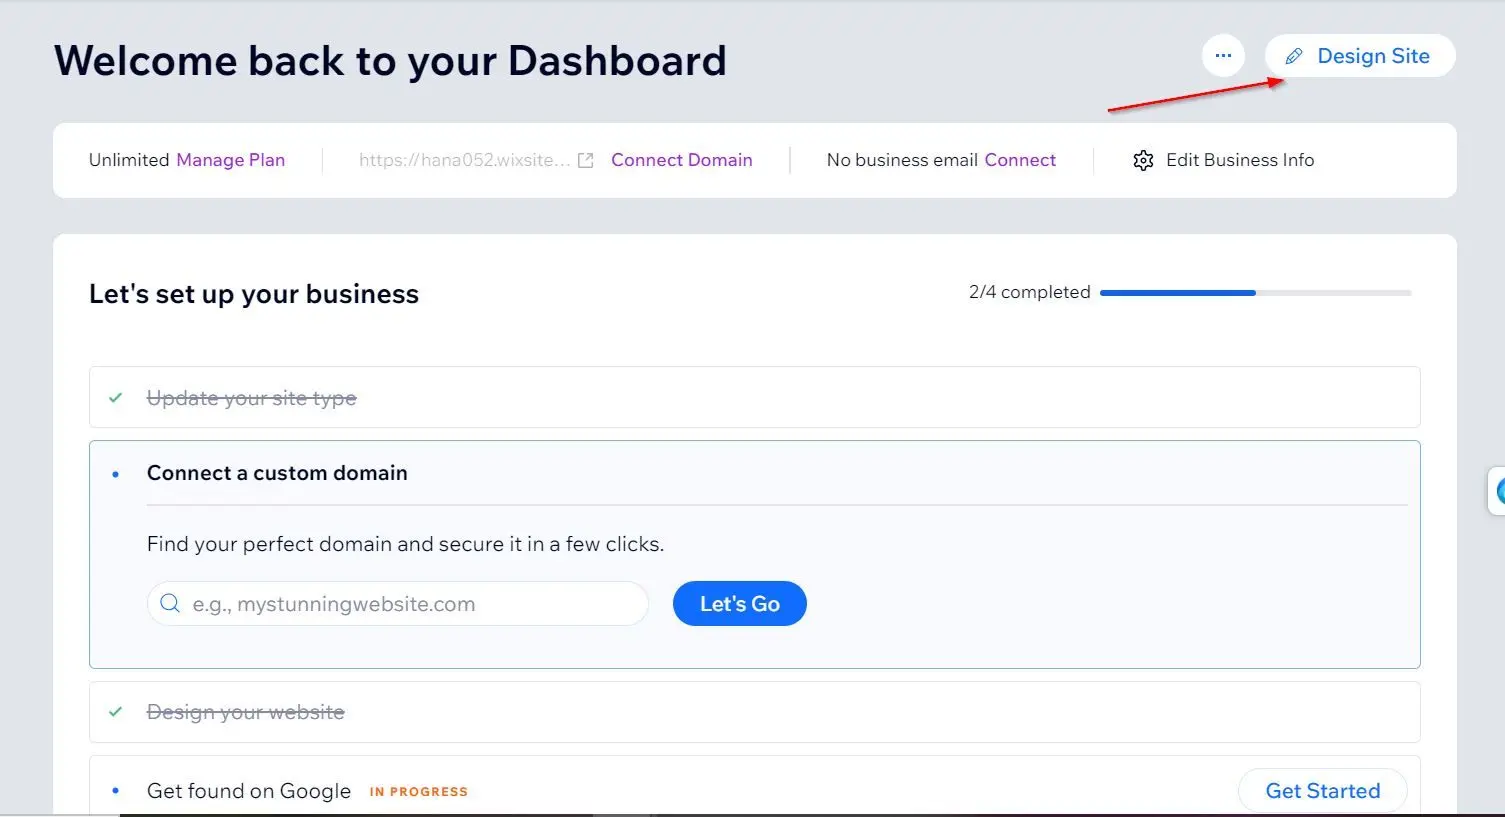
2\. On your dashboard, locate and click on **Design Site** in the top right corner of the page.
With the embed code in hand, you are now ready to proceed with the integration process within your Wix application.
## Step 3: Sign Into Your Wix Account and Embed Your AI agent
1\. Sign in to your Wix website and head to your dashboard.
2\. On your dashboard, locate and click on **Design Site** in the top right corner of the page.
 3\. Your site should load your site on the Wix website editor.
4\. Scroll down to any section of the website you wish to add the Chatbase agent.
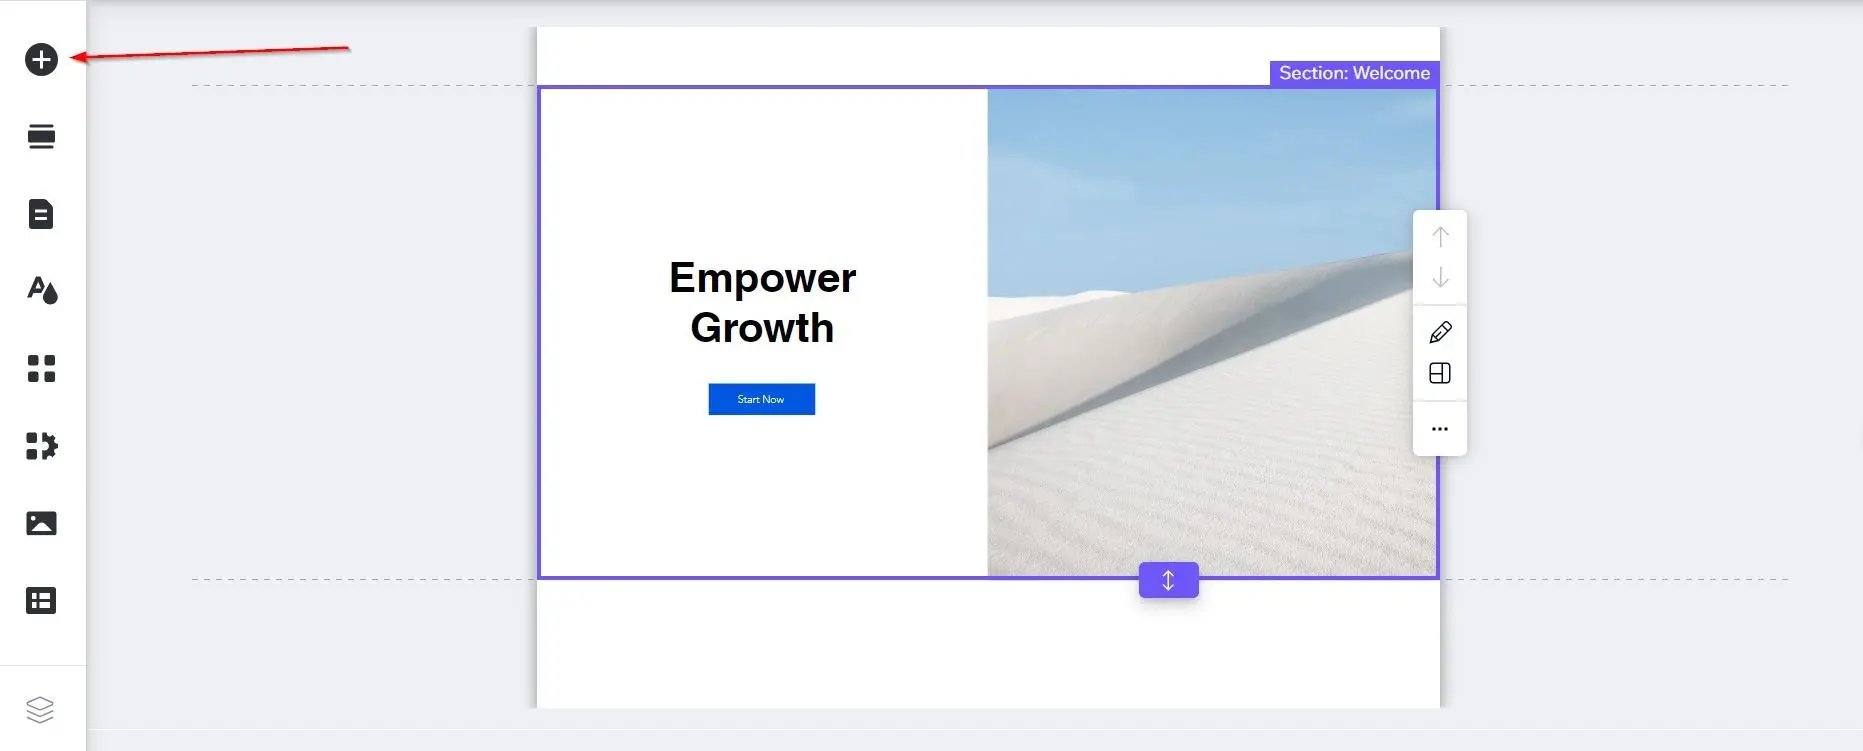
5\. Click the big plus (**Add Elements**) button on the left sidebar of the Wix site editor.
3\. Your site should load your site on the Wix website editor.
4\. Scroll down to any section of the website you wish to add the Chatbase agent.
5\. Click the big plus (**Add Elements**) button on the left sidebar of the Wix site editor.
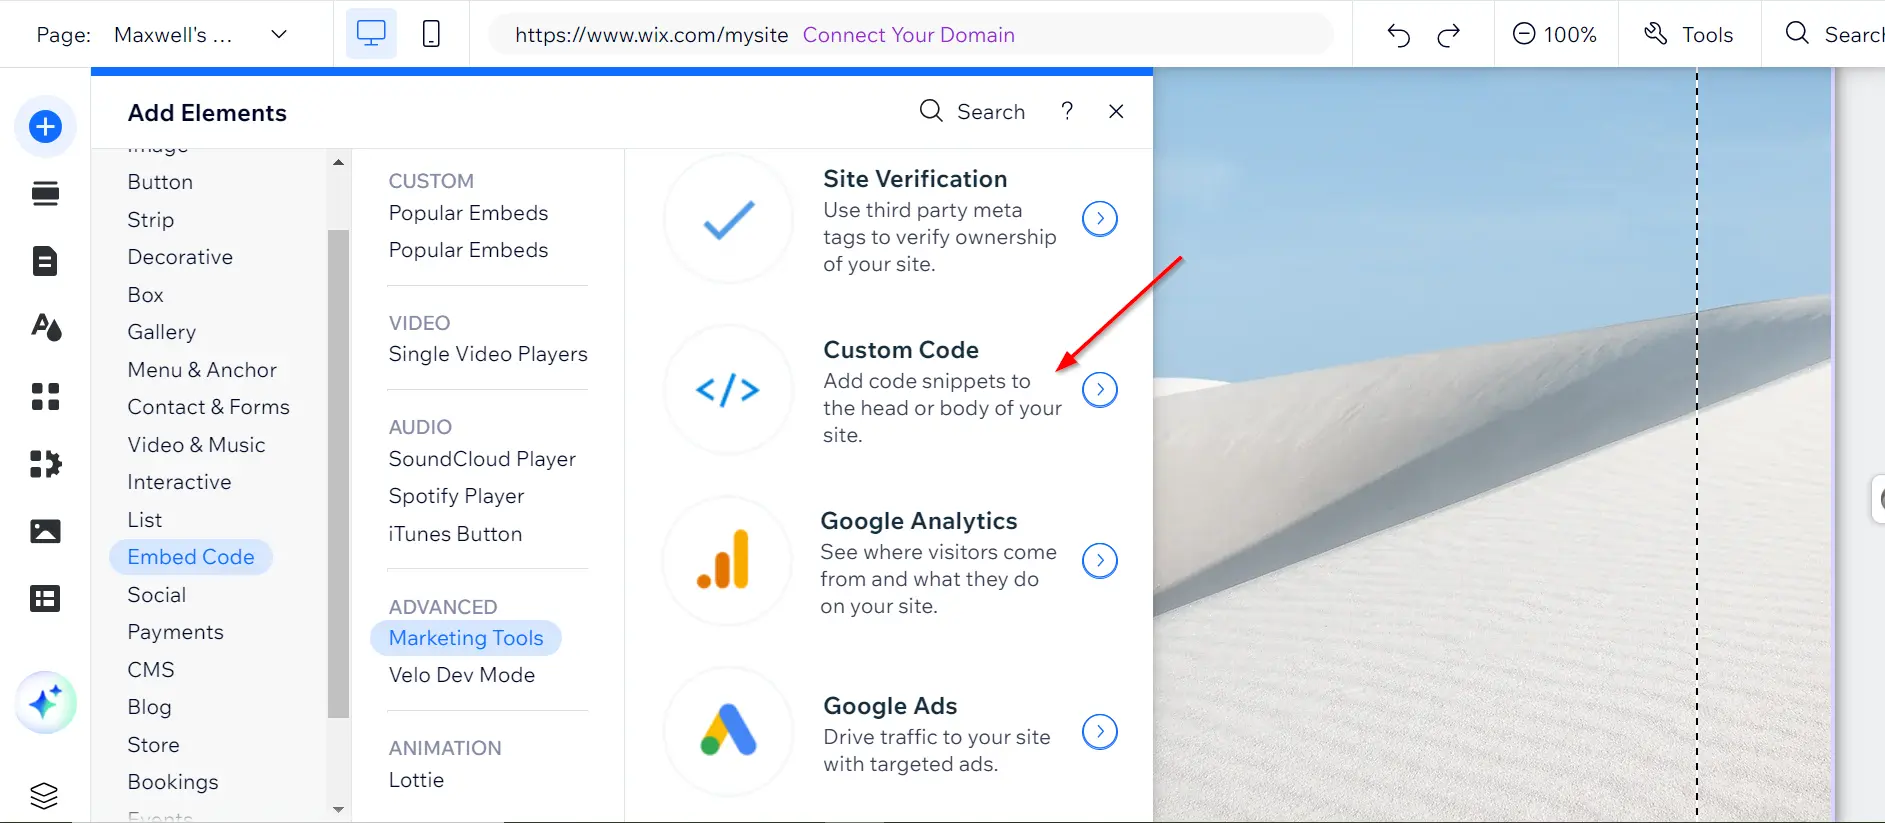
 6\. Scroll down to locate and click on **Embed Code**, followed by **Popular Embeds** and then **Custom Code**.
 7\. The custom code widget should pop up, click **+ Add Custom Code** in the top right
8\. Paste the code snippet into the custom code editor.
9\. Provide a name for your code.
10\. Choose an option under **Add Code to Pages**.
11\. Choose where to place your code under Place Code in
12\. Click Apply. Once you've applied the changes, preview your website and you should see the floating Chatbase chat icon on your website.
7\. The custom code widget should pop up, click **+ Add Custom Code** in the top right
8\. Paste the code snippet into the custom code editor.
9\. Provide a name for your code.
10\. Choose an option under **Add Code to Pages**.
11\. Choose where to place your code under Place Code in
12\. Click Apply. Once you've applied the changes, preview your website and you should see the floating Chatbase chat icon on your website.
 **Congratulations, your Chatbase agent is now live on your Wix website.**
You can customize the appearance and colors of your agent on your Chatbase dashboard. To do this, go to your **dashboard**, choose an agent, click **Channels** in the left sidebar, click **Manage** on the **Chat bubble** card, then open the **Display** tab to edit Content, Capabilities, Colors, Floating bubble, and Localization.
**Congratulations, your Chatbase agent is now live on your Wix website.**
You can customize the appearance and colors of your agent on your Chatbase dashboard. To do this, go to your **dashboard**, choose an agent, click **Channels** in the left sidebar, click **Manage** on the **Chat bubble** card, then open the **Display** tab to edit Content, Capabilities, Colors, Floating bubble, and Localization.